Add Related Lists with the Table Component
This lesson shows you how to include related records (i.e. related lists) on a detail page using the Table Component.
Goal: Include a searchable table of related records with inline editing.
Skuid tables are inline editable and searchable by default. You can also create custom filters to search a list of records with ease. This helps make your organization more productive because it reduces clicks: users will spend less time trying to find relevant information and more time interacting with it.
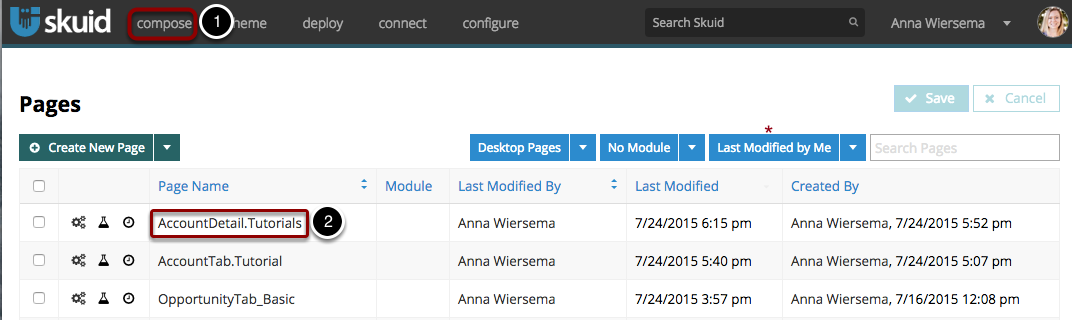
Step 1: Click Compose and open a detail page.
In this tutorial, we’ll be working with the Account Detail page, but you can also use the Detail page for a Custom object. If you haven’t built a Detail page yet, check out the tutorial Build a Custom Detail Page for instructions.
- Click Compose to view the Pages list.
- Click on the page you want to open.
Note
You can use the filters at the top of the table to quickly find the page you’re looking for.
Step 2: Add a model on a related object.
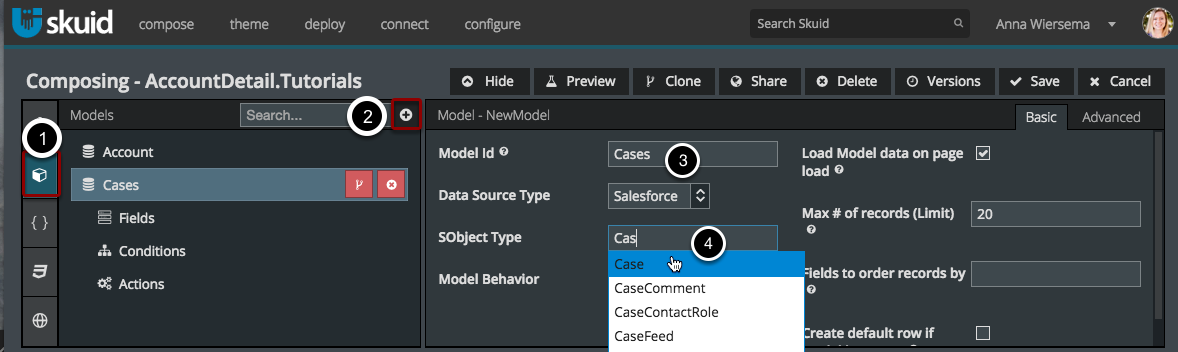
For this example we’re going to choose the Cases object, but you can choose any object that’s related to the main object on your page. For objects with many to many relationships, choose the junction object (e.g. AccountCaseAssociation__c). Check out the Opportunity Products tutorial for more information on this. (Note: You can also use include data from unrelated objects on the same page. Follow these same steps, but don’t add the condition in Step 4.)
- Click Models.
- Click to add a model.
- Name this model something useful to you (e.g. Cases).
- Start typing the object’s name in the SObject field and select it from the drop-down list
Note
You can also set other Model properties, such as determining how to order records on this model and the max number of records which will be displayed on this page at one time.
Step 3: Choose the fields to include in the Cases Model.
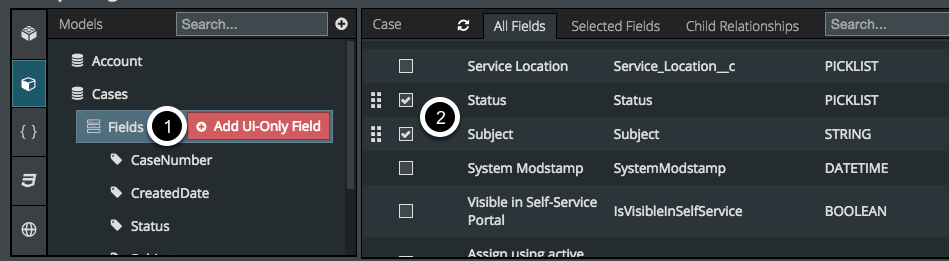
- Click Fields
- Check the fields you’d like to include in the Model (to be used with your Table – for this example we’ll use Case Number, Created Date, Status, and Subject)
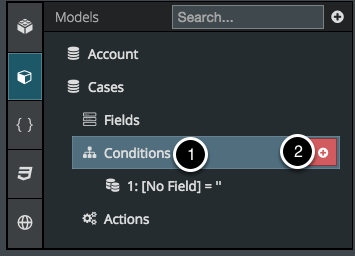
Step 4: Add a Condition to include only records related to your primary page object.
Note
If this object is unrelated to your main page object, you can skip this step.
- Click Conditions
- Click the [+] button to add a new Condition.
Edit the Condition’s properties.
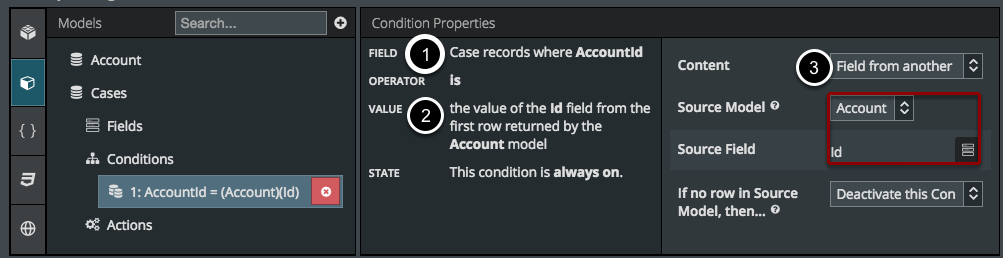
- For Field, choose the Salesforce Id field of the main page object. For standard objects, this will look like AccountId. For custom objects, it looks like ParentObject__c (the lookup field to the parent object).
- Click Value.
- For Content, choose Field from another model, and the Id field from your Parent Object model will automatically appear.
This condition will only pull in records related to the Account in the first row of the Account model. To create an Account model with only one row (that users specify) see Build a custom Detail page.
Note
If you use the Field from another model condition, your child model MUST come beneath your parent model within your Models panel, as illustrated in the above image.
Your models will load in the sequence in which they are arranged within your Models panel. Hence your child model condition will not have values to compare against unless your parent model loads comes first.
To avoid this, you may also use a URL parameter condition on your child object. Apply the condition to the parent object ID within your child object, and it will look very similar to the URL parameter condition on your parent object.
Step 5: Click Components and add a Table Component into the page.
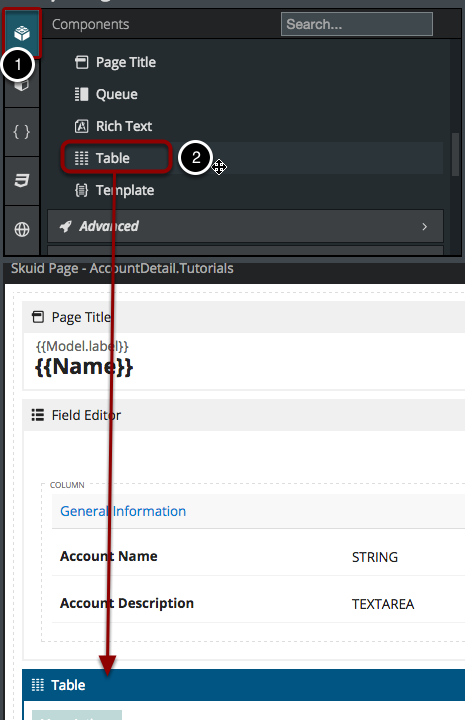
- Click Components
- Double click the Table Component (or drag and drop) to add it into the page below the Field Editor Component. (The orange strip lets you know where you can add components.)
Step 6: Add Fields from your Cases Model.
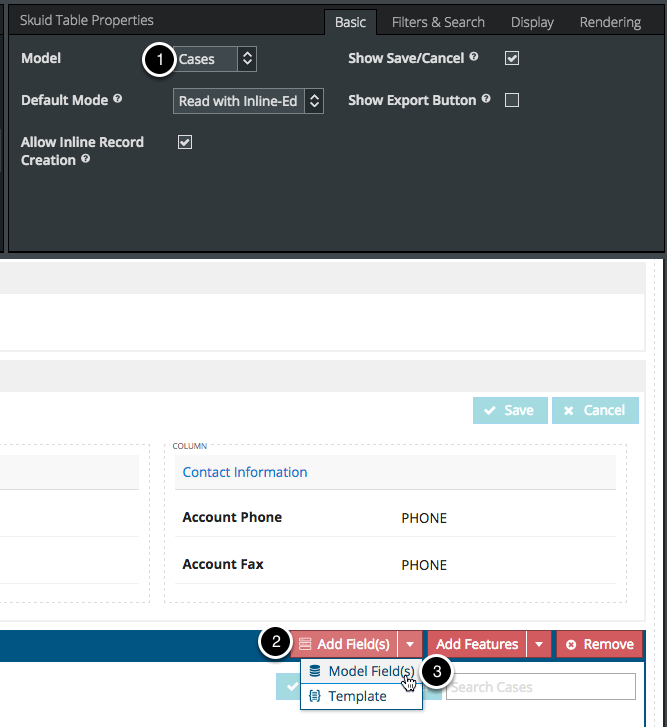
- Make sure that the correct Model is selected. In this example, we want the Cases Model selected.
- Click the Add Field(s) button.
- Click Model Field(s).
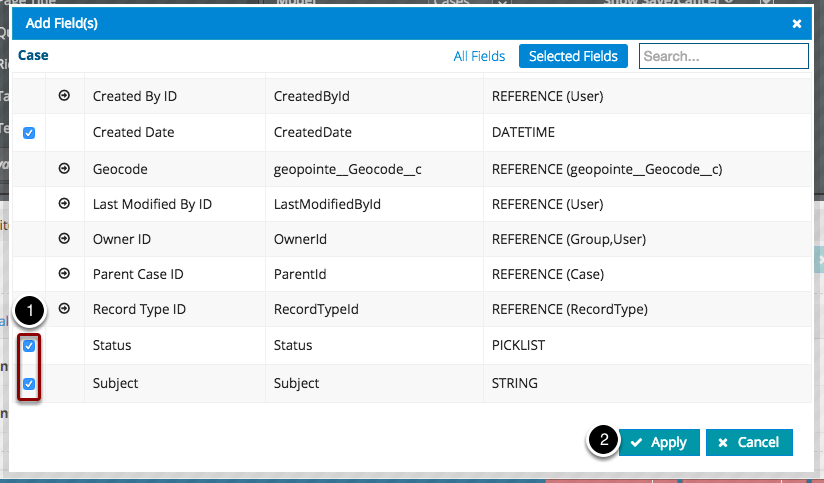
Select the Fields you want to display in the Table.
Note
To add more fields to the model, click All Fields at the top of the popup.
Click Apply.
Step 7: Click Save, then click Preview to open your new page in a new tab.

Choose the Account whose Detail Page you want to preview.
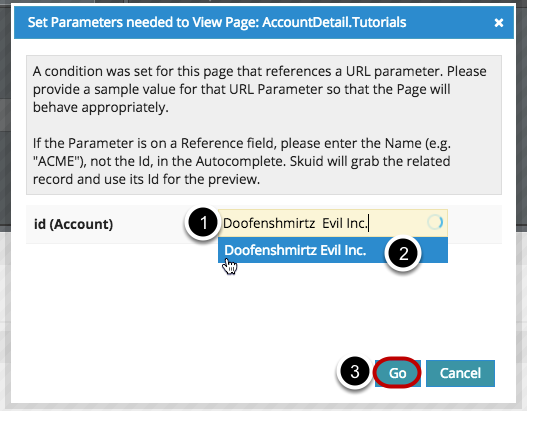
- Enter all or part of the name of the Account.
- Select the desired Account from the list. This Account’s Id field will be used to populate the Id URL Parameter when previewing our Account page.
- Click Go.
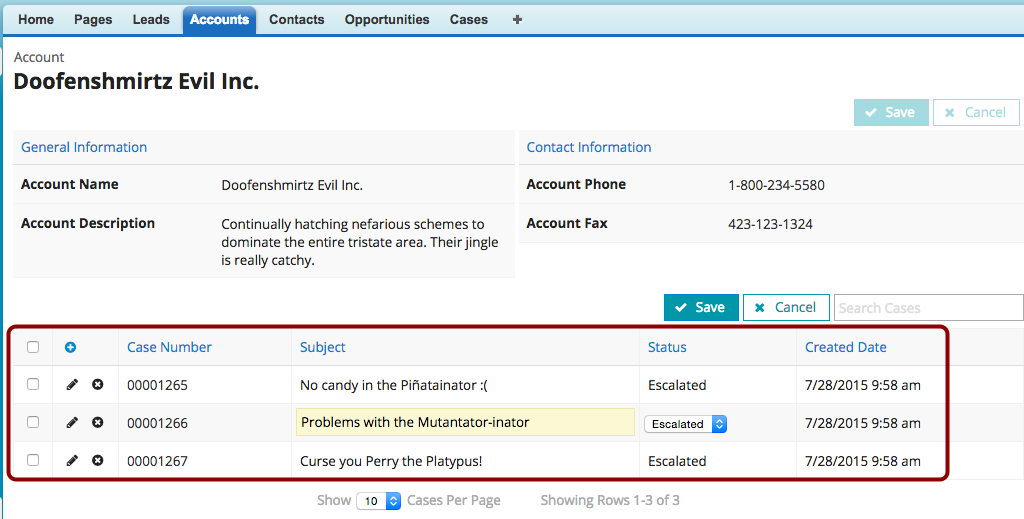
Result: This page now has a table of related Cases.
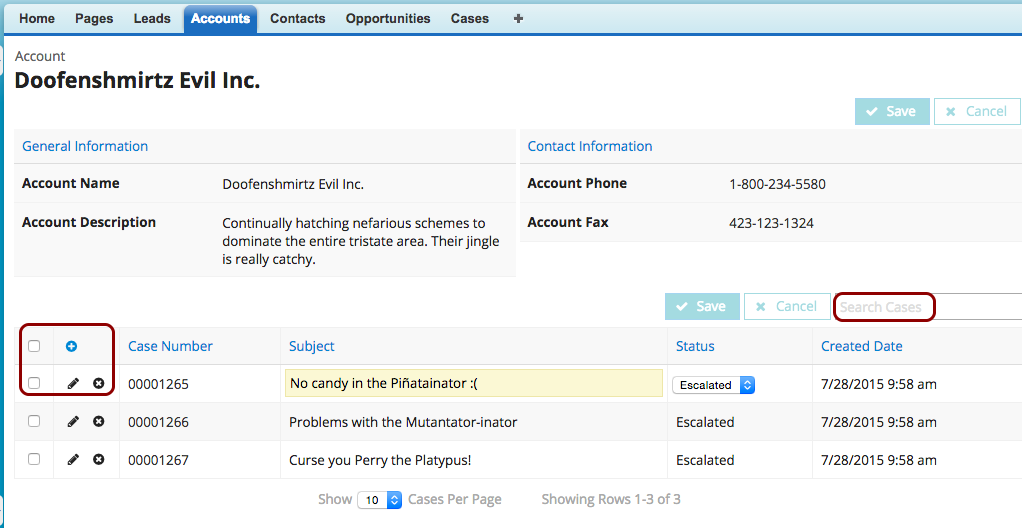
- Notice that you can easily search in this list and add, edit or delete records inline. Click on a Case Number to go to that Case’s page.
- For more information about the table component, check out the component tutorial for Table and the Action Framework section on Action Trigger Areas.
- Learn how to consolidate the Save actions on this page into one button.