User and Permission Management in Skuid Platform
Skuid Platform is its own independent service, so there are no predefined users. Instead, Skuid builders create Skuid Platform’s database of users. After users are created, their permissions and access to the platform’s various features are set with profiles.
Users
After registering for a Skuid Platform site, a default user—with an Admin profile—is created using the username and password provided at registration.
As Skuid does not pull its user accounts from any existing data source, you must register users within the Skuid Platform itself.
Warning
The users table currently will not display more than the first 50 users in the Skuid site. This is expected behavior, and any additional users that sign up or are imported do exist. You may use the User table’s filter or the search functions to see these additional users.
Add users [[]]
Add users manually [[]]
- In Skuid, click Configure > Users.
- Within the table, click Add to create a new row.
- Specify your new user’s information:
- First Name
- Last Name
- Username: The Username must be unique to your site.
- Email: The email does not have to be unique; you can have one person using with the same email—with two different usernames. Only the username has to be unique.
- Type: Full or Standard
- Active: You must check this box to allow a user to access your site. If left unchecked, new users will not be able to set their passwords or log in.
- Click Save.
Once set to Active, your new user will receive an email welcoming them to Skuid and asking them verify their email address.
After clicking the verification link, the new user will then set their password:
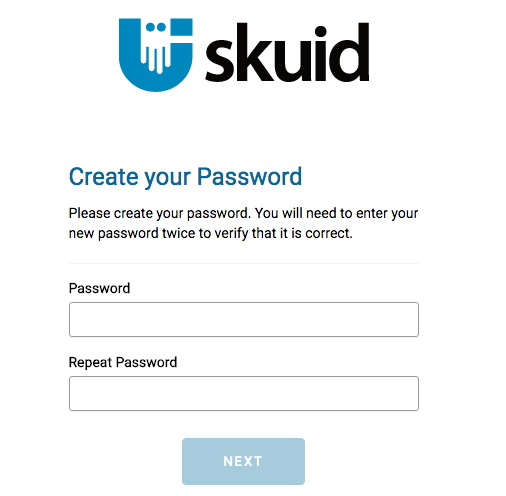
After this, your new users will be ready to use Skuid!
Add multiple users via CSV file [[]]
Using a CSV (comma separated values) file allows you to add multiple users at once.
Note
To add multiple users using spreadsheet data, the content must be exported into a CSV file. Applications such as Microsoft Excel and Google Spreadsheets let you export contents into CSV file, with discrete data segments separated by a delimiter (such as a comma or colon).
In Skuid, click Configure > Users.
At the top of the table, click the next to Add User to open the dropdown menu and select Import CSV.
In the CSV Import Users modal, select:
Delimiter: The options are a comma (“,”) or a semicolon (“;”). Make sure to select the same delimiter that is used within the CSV file to separate sections of data.
Default Profile: Select from a list of profiles currently available in this site.
Note
This profile will be used for all imported users, but it can be changed for individual users after they have been imported.
Click Upload to search for and upload the CSV file.
Click Assign Columns and map the user information fields to the corresponding CSV column.
Map CSV Columns to User Fields Properties
Required Fields
Email
First Name
Last Name
Username
Warning
The username must be unique to the site or the user will not be created.
Optional Fields
Profile: If there is a column in the CSV file that corresponds to the individual’s profile, indicate it here. Adding a “profile” column to the CSV file means that users will be imported with their assigned profile because values in this column supersede the Default Profile (above).
Note
- If no column is selected here, all users are assigned the designated Default Profile.
- If a column is selected, but values in the column do not match the list of available profiles, those users will be assigned the Default Profile.
Federation Id
Type
Locale
Time Zone
Click Preview to see the list of users to imported.
Click Confirm & Import.
Note
If the CSV file is large, importing may take a while. This process is performed in background so you can continue working in Skuid.
Once the users have been imported, locate them in the list of users and modify the following column:
- Active: You must check this box to allow a user to access your site. If left unchecked, new users will not be able to set their passwords or log in.
Click Save.
User provisioning through SSO [[]]
Skuid Platform supports user provisioning through any SAML-compatible identity provider. If you have many users, all of whom already have an account on your identity provider, this method of user creation is highly recommended—and a lot more efficient.
For more information, see the User Provisioning within Skuid Platform section of the Introduction to SSO, SAML, and Skuid topic.
Reset user passwords [[]]
While users can reset their own passwords, Skuid administrators can also initiate this process from the Users screen:
- Navigate to Configure > Users.
- Click Reset Password beside particular user.
Users will then receive an email containing a link to reset their password. Note that user password will not change until users click the link within the email.
Activate and deactivate users [[]]
Users within Skuid Platform cannot be deleted. Instead, users can be activated and deactivated. Deactivated users do not count against your Skuid subscription limit.
To activate or deactivate users:
- Navigate to Configure > Users.
- Click Activate or Deactivate beside the particular user.
You can activate and deactivate users as needed. Users will not receive a notification of their activation status, but will their access will be immediately granted or revoked respectively.
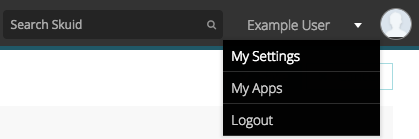
My Settings
Each user can configure their own Skuid settings by clicking their name in the Skuid navigation bar and clicking My Settings.
From this page, users can update the following personal settings:
- First name
- Last name
- Username
- Federation Id (If the site has SSO enabled)
They can also update their personal locale settings, including:
- Locale
- Time Zone
- Language
As well as site behavior settings:
- Land On Last Visited Page After Login: If enabled, the user will be directed to the last Skuid page they visited whenever they log in. Otherwise, they are redirected to their profile’s default app. Disabled by default.
My Data Source Credentials
Users can enter, save, delete, and edit usernames and passwords for any data source configured for Per-user credentials.
Profiles
Profiles determine user permissions in Skuid platform and enable you to set access to certain Skuid apps and data sources. Ensure marketing users can access marketing and sales apps, while only HR users can access the HR app—and restrict who can edit Skuid pages. You may also set access to individual data sources based on profiles. Profiles allow you to configure the perfect combination of permissions and restrictions for your users.
Note
Ensure that each profile has access to both the appropriate apps and the necessary data sources used within those apps. A user who can access an app, but not the data sources used within its Skuid pages, will encounter unexpected behavior.
Warning
Even if your page does not contain models for certain data sources, savvy users can create them dynamically using Skuid’s JavaScript API. Exercise caution when assigning each profile’s permissions, particularly for data sources secured with implicit username/password.
There are three default profiles available:
Admin: A profile with full access to all Skuid features and apps. Admins may configure Skuid pages and change site settings, so this profile should be assigned to Skuid administrators and IT administrators.
Standard: Suited for end-users of Skuid apps, this profile does not have the Configure Site permission, meaning the user cannot edit Skuid pages or change site settings.
By default, standard users also will not have access to any apps. You must configure which apps they have access to, or standard users will simply see an error page when they log in.
For more information about app deployment, see the App Deployment with Skuid Platform topic.
Public: Intended for end-users on public-facing websites, such as customer portals, every non-logged in user has public profile permissions. By default, this profile cannot access anything, and its permissions must be specifically configured.
Since public profiles can expose your Skuid app to the web, pay careful attention to the permissions you set on this profile. Also ensure that the security settings within your data source are appropriate for public use.
You cannot create multiple types of Public profiles.
Note
Any files used in Skuid pages—including themes—must be marked Is Public in the Files tab of the Skuid UI.
Create new profiles [[]]
You must clone one of the three existing profiles in order to create new profiles. Doing this provides you a baseline of permissions to start.
- Click Configure beside one of the available profiles.
- Click Clone.
- In the Clone Profile popup, name your profile.
- Click Save.
After creating your new profile, edit its permissions as necessary.
Edit profile permissions [[]]
Click Configure beside a profile to edit its permissions. Use the subtabs to edit.
Note
Skuid respects the permissions set within the external data source, and will not allow the Skuid Administrator to give a user access to content they are not permissioned to view within the data source.
Site Permissions tab [[]]
Configure whether or not a profile is allowed to:
Configure Site: Configure Skuid Platform site settings and Skuid pages;
Configure Self: Configure their own profile.
Send Push Notifications to Skuid native apps: Send push notifications via Action Framework actions (Only available if the account has signed up for Native Mobile apps.)
Note
Only the Admin profile—and profiles cloned from the Admin profile—can be assigned the Configure Site permission.
App Access tab [[]]
Set which apps a profile may use, as well as which app is the profile’s default.
Note
Only one app can be selected as default, and it must first be enabled for the profile.
Data Source Access tab [[]]
Determine which data sources a profile may access.
Note
Make sure to give users access to both the apps you want them to see and to the data sources used within those apps.
User Signup tab [[]]
The settings in this tab enable users to sign up for an account without contacting an admin. User signup is activated at the profile level and each profile can have only one self-signup setup. (However, you can create different signup experiences for each profile.)
There are two aspects to user self-signup:
- Enable the signup API—making self-signup possible.
- Enable signup pages—where users can go to perform self-signup
User Signup API
Enable signup in the User Signup API pane by clicking next to the property and modifying the following settings.
- Enable Signup API: Check this to enable the Signup API for this profile. If clicked, two things happen:
- Skuid displays Signup API URL; developers can use this REST API endpoint to programmatically generate new user accounts.
- In the Action Framework, Run Platform Action now includes a new action: Register New User. This allows builders to declaratively initiate user self-signup as part of any Skuid Page. For more information, see Manually Create a Custom signup Workflow.
- Allowed Email Domains: Whitelist specific email domains using a comma delimited format. If none are indicated, all domains are allowed.
- Require Email Verification on Signup: Checked by default. If checked, after the user has completed the signup process, they will receive an email with a link inviting them to log into the app and configure a password for their new account. If unchecked, then user signup requests must include a password along with other credentials (first name, last name, etc.) to successfully create a user account via the self-signup API.
Signup Experience
Once you enable the signup API, you can enable a default user signup experience, or create a custom-branded user signup experience. (Enabling a signup page is optional but provides guidance for the user.) To modify the following properties, click next to the property in the Signup Experience pane.
Enable Signup UI: Check this to create a signup experience for the user.
- Signup UI Type:
- Default: If checked, Skuid uses standard signup, confirmation, and verification pages.
- Custom: If checked, Skuid offers to Create Custom Signup pages:
- Custom Signup Page
- Custom Signup Confirmation Page
- Custom Verify page
Customize the signup process by clicking on each of the pages above to open and edit the associated Skuid page.
Note
You can remove these pages by clicking Remove Custom Signup Pages.
- Signup UI Type:
The values the user submits are added to the list of that profile’s users.
Assign profiles [[]]
Profiles must be assigned to users through on the Users page in Skuid Settings, accessed by navigating to Configure > Users.
- Click Configure beside the particular profile.
- In the Profile column, select a new profile type.