Multi-select Filters with Automatically Created Conditions
This tutorial will go over the capabilities of Add Table Filter selection and will show examples of the types of filters that you can build with automatically generated Model conditions.
Where do I find the Table Filter?
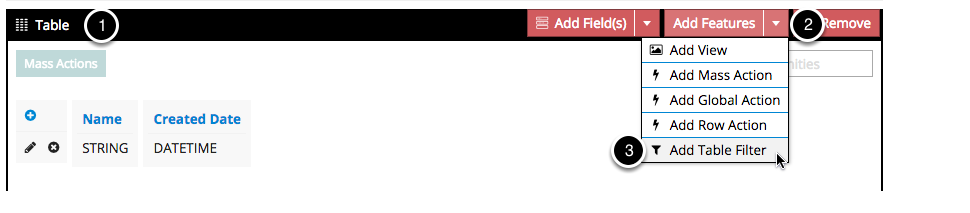
- Click on the header of your Table Component while in the App Composer.
- Click on the Add Features button.
- From the drop-down menu, select Add Table Filter. Now get busy filtering your data.
Configure a Multi-select Filter from a Picklist Field
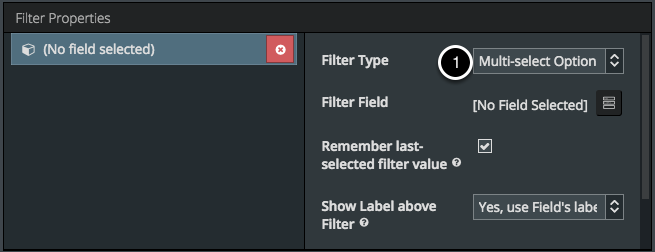
Choose Multi-select Option for the Filter Type.

Click on the Field Picker icon. Select a Picklist Field to use as the source for your Multi-select Filter.
The list of available Fields is not based on Fields you have added to your Model. The list of available Fields is based on any Field on the Object that meets the criteria of a Field that can be made into a Multi-select picklist.
Simply put: only Fields that work as Multi-select Filters are listed. That takes all the guess work out of picking a Field and hoping it works out.
If the Field is not already in the Model, then the Field you select will automatically be added to the Model.
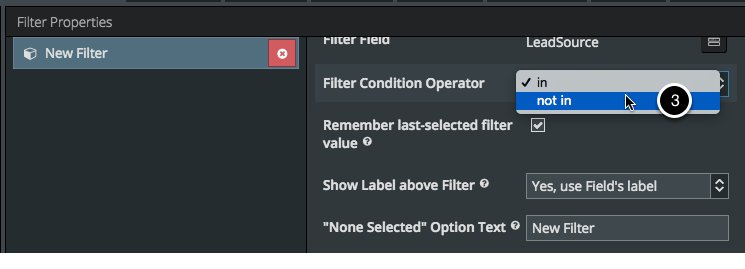
You may have use cases where you need to refine the logical conditions of the Filter. You can do that by selecting the appropriate operator from the Filter Condition Operator.
By default the condition is set to in. You can change it to not in if you want users to select multiple values they want to not be shown in the table.
By default, the Remember last-selected filter value check box is marked to allow the Table to remember Filter selections after the page is reloaded or refreshed. If your customers navigate away from this page and come back to it later, then the Filter selections won’t vanish! This information is stored in Skuid’s personalization framework.
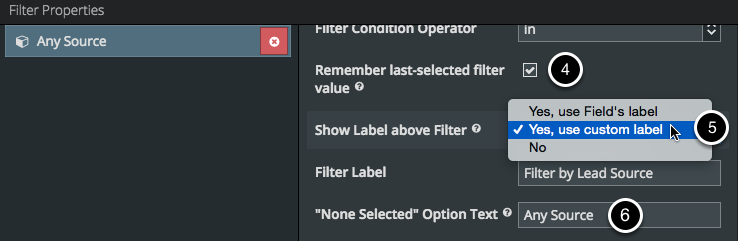
You can display text above the Filter by selecting the most useful option from the Show Label above Filter picklist.
- Yes, use Field’s label will display the name of the Field, naturally.
- Yes, use custom label will cause a Filter Label Field to be rendered when this option is selected (as shown above). Enter the custom text you want into this text box.
- The No option: no labels. Simple.
If no selections have been made, then you can determine the text displayed on the Filter button by entering the desired message in the “None Selected” Option Text box.
Let’s See the Multi-Select Filter in its Natural Habitat.
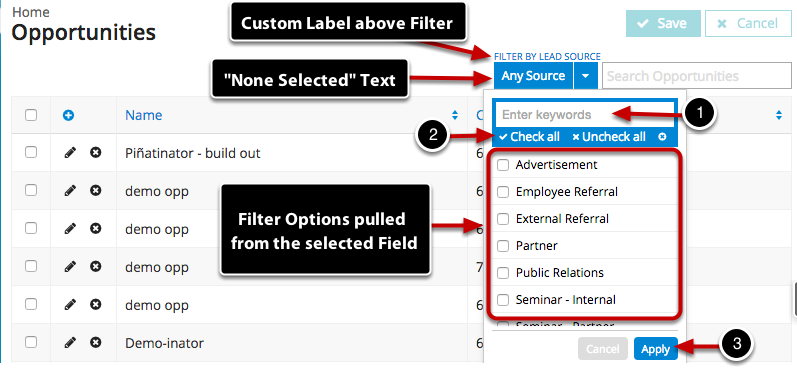
If you have a long list of Filter options, then you can save yourself from hunting down your Filter term by using the search box.
When you want all the Filter options, you can select Check all. When you want to clear the selections you’ve made, then you can click the Uncheck all button.
The Multi-select Filter won’t do its job until you click the Apply button. This keeps things from firing off on the underlying Table while you are trying to set the Filter parameters. Cancel, to no one’s surprise, cancels the Multi-select box and closes the drop-down menu.
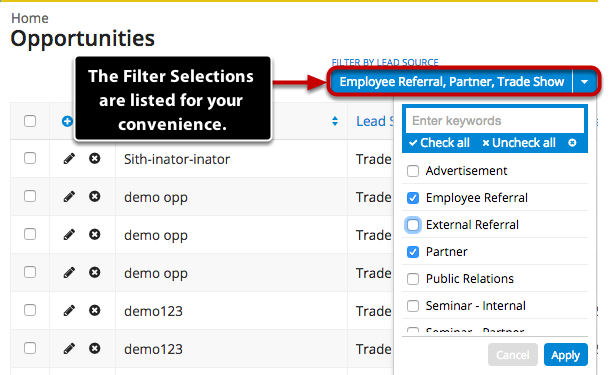
Apply the Filter parameters based on the Contact Method will “filter” out any records that do not include a Contact Method that matches one of the selected items from the Multi-select Filter.
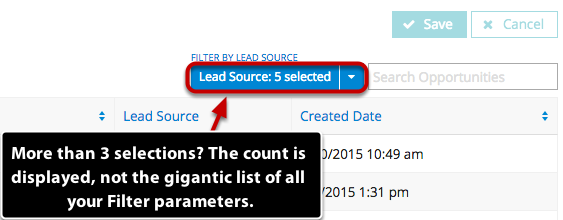
Up to 3 items can be listed by the Filter. You can, of course, select as many items as you wish, but it would get too crowded if each of your 12 Filter selections were displayed (see below).
Automatically Created Conditions with Filters
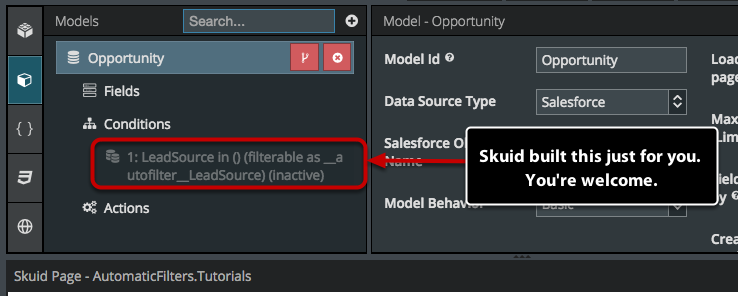
Notice that you can not make changes to this condition. If you want to tinker with the conditions that a Filter manipulates, then you’ll need to build your own Filter!
This condition will be automatically updated after you’ve made changes to your Filter properties and you’ve clicked the Save button and refreshed the page.
Configure a Multi-select Filter from a Reference Field
You may have noticed earlier that Reference Fields were listed as an available Field when selecting the source Field for the Filter.
Go back to your Table, click the Add Features button, and click the Add Table Filter button.

- In the Filter Properties, choose Multi-select Option as the Filter Type.
- Click on the Field Picker button.
- Find the Reference Field you want to use as the source for your Multi-select Filter. In this example, we’ll choose the Account Field.
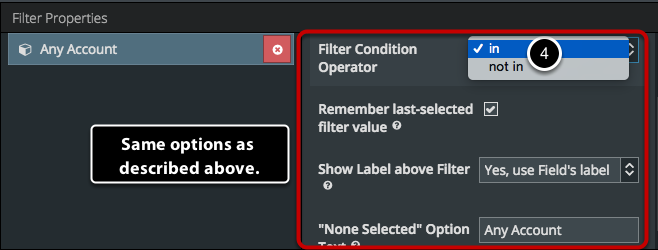
- The Filter Condition Operator changes for the Reference Field because the requirement is for a direct match and not an includes option.
Using a Reference Field-Based Multi-Select Filter at Runtime

Save your page. Then, Preview your page.
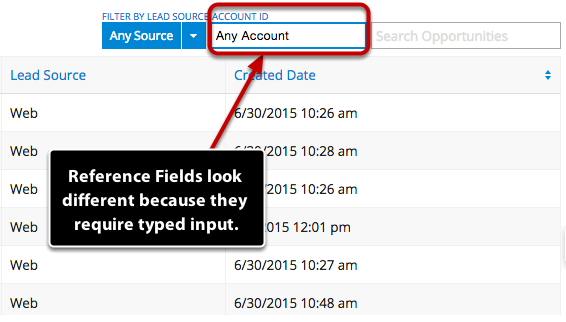

Your Table has now been filtered by the Acme Account ID!
Select Multiple Options on a Reference Field-based Filter
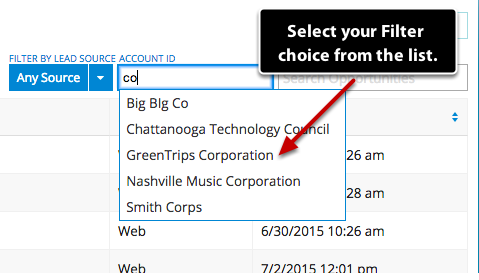
Double-click on the text in the Multi-select Filter. Don’t click on the X (that just clears the Filter parameter). While the text is highlighted, type in your next Filter term. Make your Filter selection from the autocomplete list and the result should look like the image below.

You can add as many selections as you need to properly filter your Table.
The “how to add more Filter parameters to a Reference Field Filter” is not really intuitive, so we wanted to explain that you need to clear out the text (by double-clicking, then typing out the next Filter parameter) to add a new one.
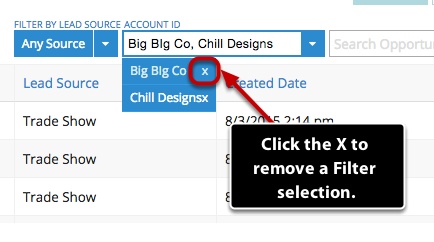
Removing a Filter selection is simple. Click the drop-down menu arrow, then click the X to remove the selection.
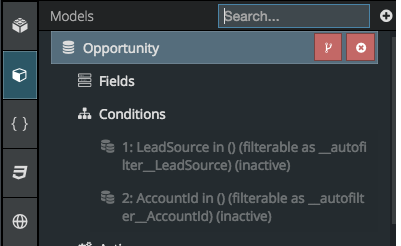
In this tutorial, we’ve created 2 Multi-select Filters. Each of these Filters automatically generated their own Model conditions (as shown above).
Multi-select Filters expand your ability to choose the information displayed in your Table. The option to use automatically generated Model conditions reduces the amount of time you spend building your Filters.