Progress Indicator Component
The Progress Indicator is a sample custom component developed by Skuid, but not included in the product core. This article shows how to download the component from GitHub and install it in a new Component Pack in your org.
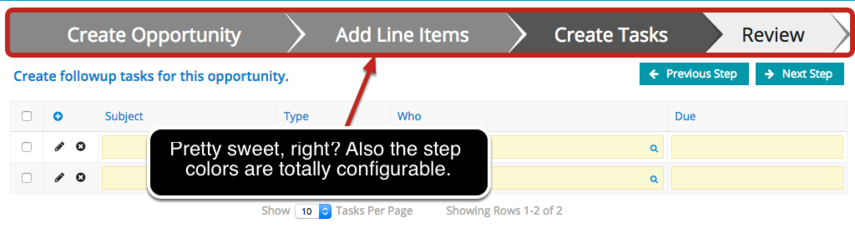
The Progress Indicator Component connects to a tabset or wizard and shows users where they are in a process. Each step in the Progress Indicator connects to a single tab in a Tabset, or a step in a Wizard. You can also go through the JavaScript and CSS files for this component and see how it’s set up, to help you in developing your own custom components.
The Progress Indicator in action:
Step 1: Download the progressindicatorpack zip file from GitHub

- Go to the progressindicatorpack.zip page.
- Click View Raw to download the zip file.
Step 2: Create a New Component pack
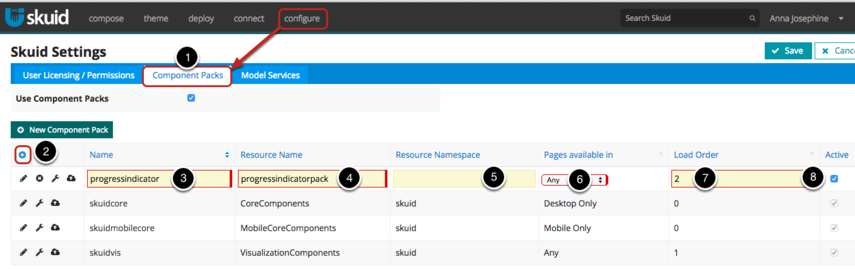
- In the Skuid app, click Configure > Component Packs.
- Click on the plus sign to create a new component pack. (It is all green and tempting, but do not click on the New Component Pack button. It will make this process more complicated.)
- Name your new pack progressindicator.
Warning
This is the name of the component as defined in the package details of the progress indicator component, so do not change the name unless you edit the reference to “progressindicator” in the package definition files.
- Enter the Resource Name for the static resource. Remember this name! You’ll need to enter it as the name of the static resource you will create later on.
- You don’t need to enter a Resource Namespace.
- Choose whether the Pages in this pack should be available in Desktop, Mobile, or Any Composer.
- Choose the order that you want this component pack to appear (in the Components tab in the App Composer).
- Click to activate this component pack, to be able to use it in the Composer.
Step 3: In the appropriate Salesforce org, upload the zip file as a static resource
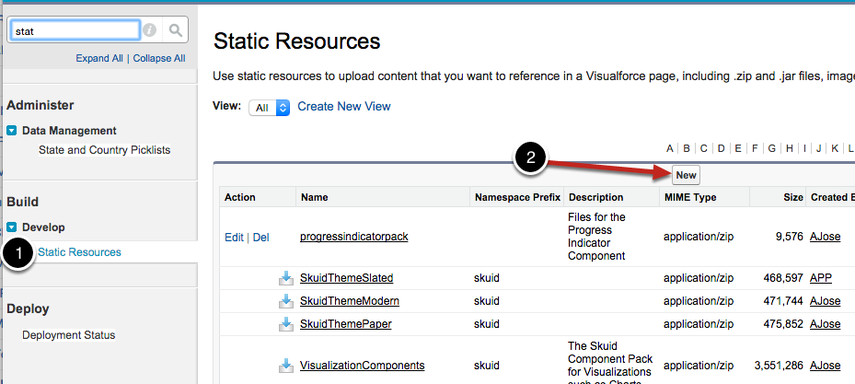
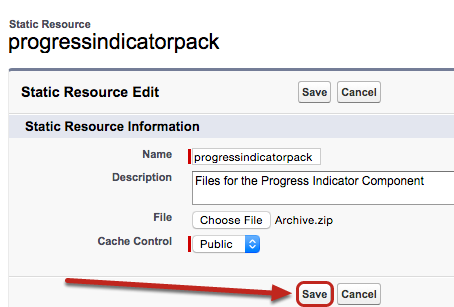
Go to Setup > Develop > Static Resources and click New.
A. Enter a name and click Choose File
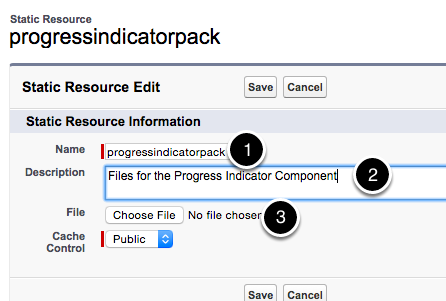
In this example, we’re naming it “progressindicatorpack.”
Warning
We defined this name in a previous step. Make sure the name you enter for this static resource matches the name you established as the resource name when you created the component pack!
- Enter a description if you so desire.
- Click Choose File.
B. Select the progressindicatorpack file you just downloaded

- Select the Component Pack zip file from your computer.
- Click to upload this file.
C. Click Save.
Test it!
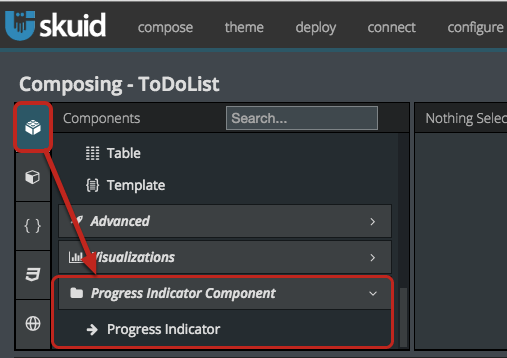
When you open the App Composer, the Progress Indicator should appear in the Components tab.
Progress Indicator Overview
Drag the Progress Indicator into your Composer.
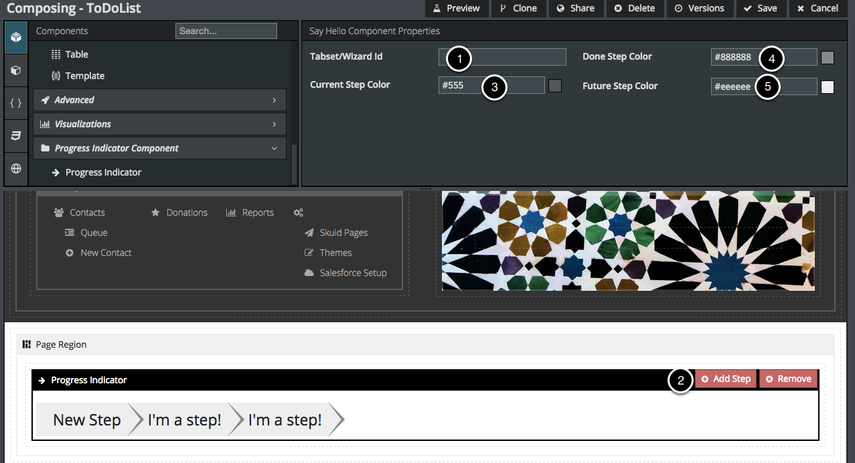
- Connect this Progress Indicator to a Tabset or Wizard component using that component’s unique Id.
- Add one step in your Progress Indicator to correspond to each tab in your Tabset or step in your Wizard. (You can click on an Indicator step to change its name, or enter a descriptive title, e.g. “Create Contact,” “Create Related Cases,” “Confirm,” etc.).
- Choose the color in which you want the user’s current tab/step to be shown.
- Choose the color for previous steps.
- Choose the color for future steps.
Now, when your users are working through the process on this page, the progress indicator will light up the step that they’re on and show them where they are in the process.