Child Relationships
In this tutorial, we’ll show how to show fields from child relationships on a Field Editor in the parent object. (Yes - in Skuid this is possible!) In this example, we’ll include a “Cases” field on a Field Editor set to the Account model.
Create a model for your data
Include all relevant fields you want in your Field Editor. For our example we’ll use the Account Salesforce object. We’ll also set the Model Id to “AccountsData” and select the following fields within the model: Account Name, Account Description, Account Phone, Billing Address, Employees, and Owner ID.
If you are following along, note that you’ll also need to set your model condition to make this a detail page.
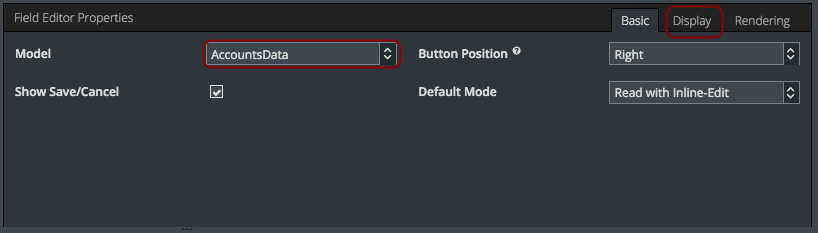
Create a Field Editor set to the parent object.
For more information on how to build a Field Editor, check out the Field Editor topic.
In this example, we’re choosing to show the Label above the Field, because it saves space and will look better with our list of cases. You can set this within the Display tab.
In the parent object model, click Child Relationships and then select the appropriate child object.

- Click Models > AccountsData > Fields.
- Click on Child Relationships.
- Use the search box to help you quickly locate child objects.
- Check the appropriate child object (e.g. Cases).
Select the child Object fields you want to include.
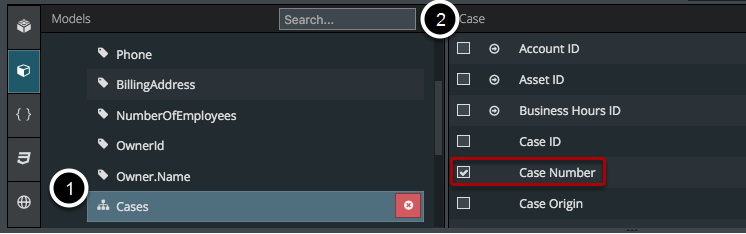
- Click on the child object within your model’s fields to see the fields within that child object.
- Check the fields you wish to access from within your child object. For our example, let’s check Case Number and Subject.
Drag and drop the child object into the Field Editor.
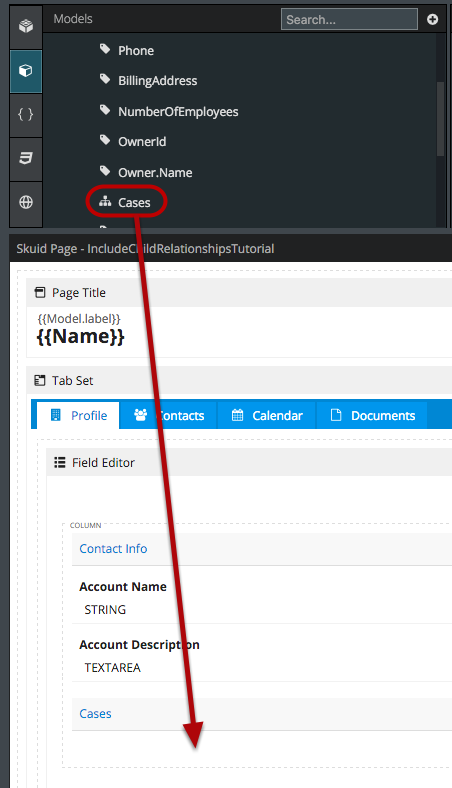
Note that you must drag child relationships from the left-hand panel using the tree-chart icon. You cannot add them from the “Add Model Field(s)” button.
Edit Field Properties for the Child Relationships Field.

Once you’ve dragged your child object onto the Field Editor, you’ll notice that it essentially becomes a Template component as a field, and its capabilities are much the same. To begin setting up your child object field, click on the new field if it’s not already selected.
- Enter a custom field label. On this example, we’ll leave the label blank and use a section header instead.
- Enter a template including the fields you selected in Create a Field Editor set to the parent object. Put them in {{curly brackets}} or select them by clicking on the field-picker icon (highlighted in red).
- All of this parent’s child relationships will be displayed in this field. That means every case associated with this account will be displayed, and the text within the Delimiter field is how the cases will be separated. We’ll use the HTML break tag <br/> to make each case it’s own line. (Make sure that you check Allow HTML or this delimiter will not work!)
Result: Save and preview to see your child relationships displayed!
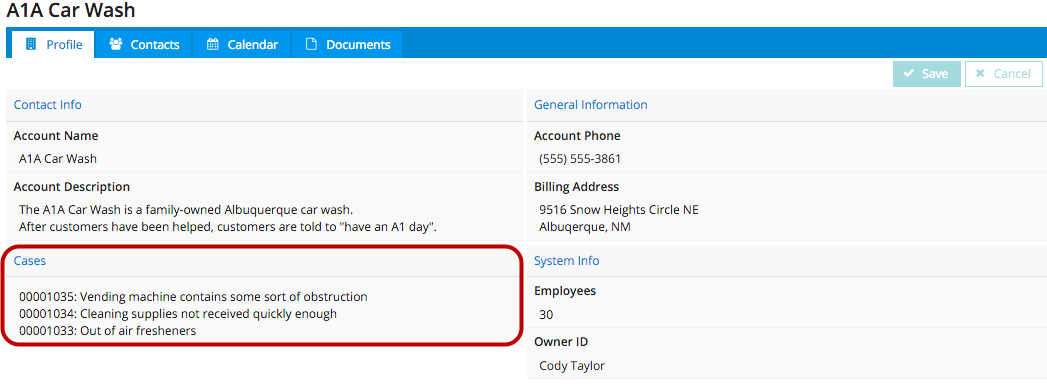
Note that your child object fields will not be inline editable. If you want to edit this data, you can add a table on the child object (e.g. Cases) or the join object (e.g. in the case of Opportunity Products).