Conditionally Display Fields
This example shows you how to conditionally hide a Contact’s Phone number if the Contact’s “Do Not Call” field is checked.
There are two ways to do this:
- Use Conditional Rendering to hide phone field(s) when “Do Not Call” is checked (Option A, Steps 1-5).
- Use template syntax to show “HIDDEN” if “Do Not Call” is checked, or phone numbers if it is unchecked (Option B, Steps 1-4).
Warning
You must have Field-Level Security permissions properly set before you can 1) add and/or 2) view and change the DoNotCall Field. You may be able to add the DoNotCall Field to your Model and Skuid Page, but not actually have Field-Level Security permissions to edit the Field when you Preview the page or view the page in Production. See the How to Configure Field-Level Security for the DoNotCall Field on the Contacts Object section for more details.
Option A
Step 1: Start with a pre-created Skuid detail page on the Contact object, or make your own
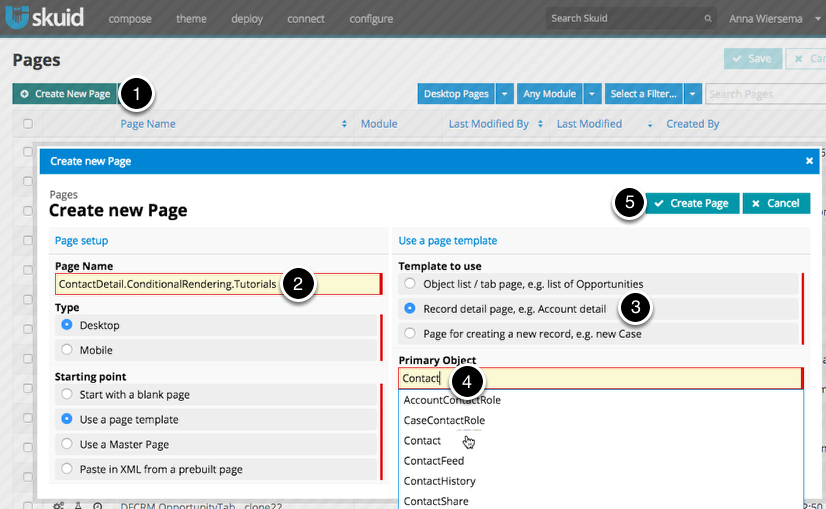
If you haven’t already created a Contact Detail Page,
Step 2: In the Contact Model, add the Do Not Call and Phone Fields

- Click Models > Contact.
- Click Fields.
- You can search for the fields you want by typing all or part of their name.
- Check the fields to include them in the Model.
Step 3: Drag and drop the DoNotCall and Phone fields into the Field Editor
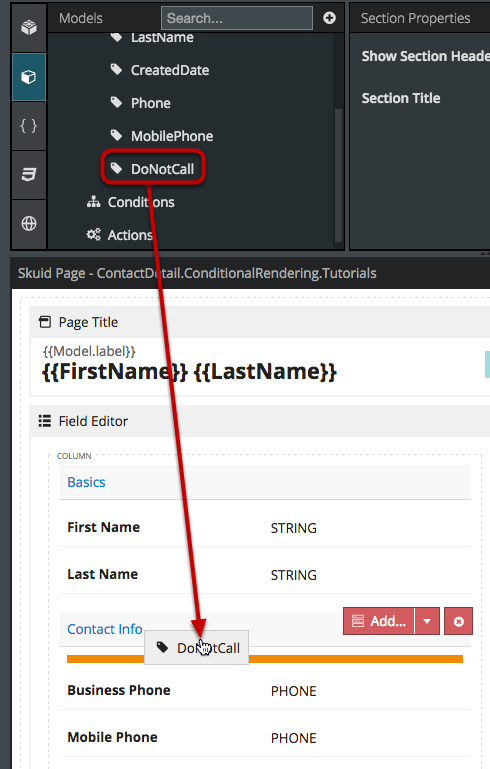
You can drag and drop Fields in from the model, or you can click on the Add Field(s) button for the appropriate section.
For more information about the Field Editor component, check out the Field Editor topic.
Step 4: For each Phone field, add a rendering condition
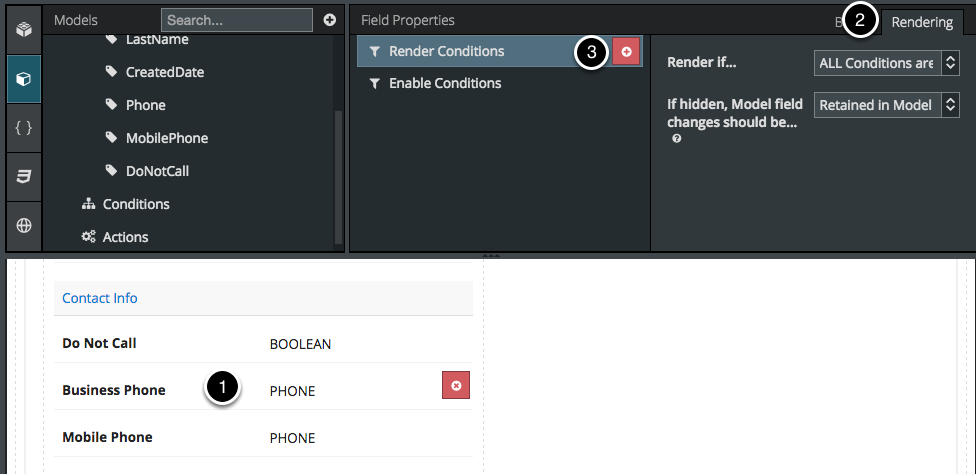
- Click on the field.
- Click on the Rendering tab in the Properties Pane.
- Click to add a Render Condition.
By default, your component will render if ALL Conditions are met, but you can change this to if ANY Conditions are met, or add your own custom logic. You can choose what happens to field changes if the field is hidden (e.g. a user updates a contact’s phone number, but then clicks “do not call,” which hides the phone field. By default these changes are retained in the model so they will be saved, but you can choose to cancel the changes when the field is hidden, if you so desire.
Add a Condition
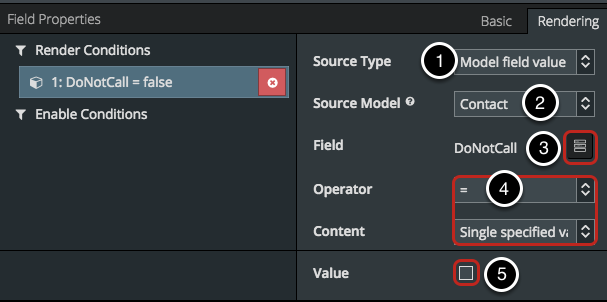
- Choose Model field value as the Source Type.
- Select Contact (or whatever model your controlling field is on) for Source Model).
- Choose the field you want to control this field’s rendering, in this case the Do Not Call field.
- Keep Operator and Content as = Single specified value.
- Enter the value for which you want this field to render, in this case we want it to render if Do Not Call is unchecked (i.e. false).
Repeat Step 4 for any other fields you want to conditionally render (in this example, that’s any other phone fields).
Note
This rendering tab is available not just on fields, but also on components, and field editor sections and columns, so for example you could have a “Contact Info” section of your field editor that you show/hide at will using a duplicate of this condition.
Step 5: Click Save and Preview

Since this page is a detail page, we have to choose which record we want to preview.

When Do Not Call is unchecked, your Phone Fields will render.
Checkbox fields can be a little finicky.
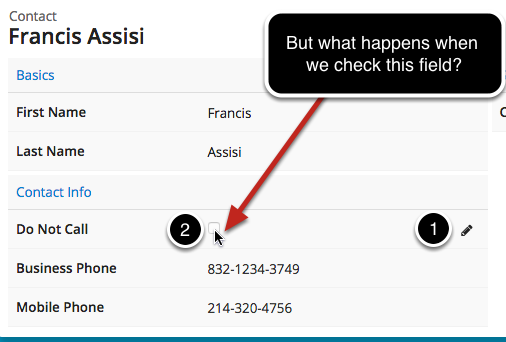
- Click on the pencil to open the field for editing.
- Now you can check the box.
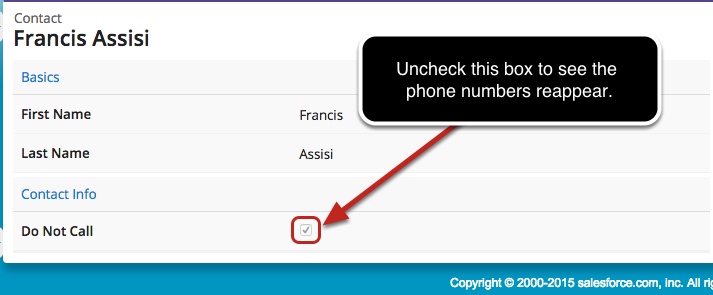
Success! Phone Fields are now hidden.
Option B: Conditional Rendering in Templates
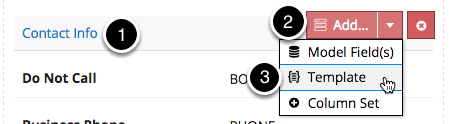
Another way to conditionally show/hide fields is via a template. For your Field Editor section, click Add… to add a Template, or drag and drop the Template component into your field editor from the component list.
Step 1: Enter a Template

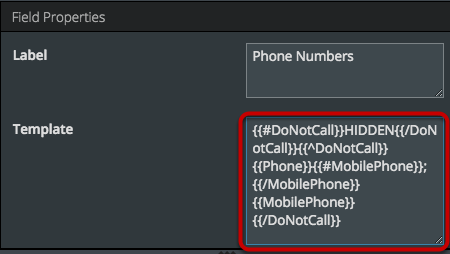
- Rename the Template Field something suitable (e.g. Phone Numbers).
- For the Template Syntax, enter the following: {{#DoNotCall}}HIDDEN{{/DoNotCall}}{{^DoNotCall}}{{Phone}}{{/DoNotCall}}
The # section operator will only display its contents (in this case, the text “HIDDEN”), if the value of the DoNotCall field is NOT empty, undefined, or false. In this case, since DoNotCall is a Boolean value, an unchecked field would be false. If the field IS empty, undefined, or false, (in this example, if DoNotCall is unchecked), then the ^ section operator will be applied, here causing the {{Phone}} field to display.
Note that the same rules apply for Template Syntax when referring to text fields. The ^ and # operators in the curly brackets will test whether a text field is blank or filled out, respectively.
If you have more than one Phone field, you can structure the second part of the template differently:
Where the original template syntax just said {{Phone}}, this one reads:
{{Phone}}; {{MobilePhone}}
to include both phone fields in the template.
Step 2: Click Save and Preview.
Since this page is a detail page, we have to choose which record we want to preview.
Step 3: If Do Not Call is NOT selected (unchecked), the Contact’s phone number(s) will appear. You can double-click on the template field to edit them.
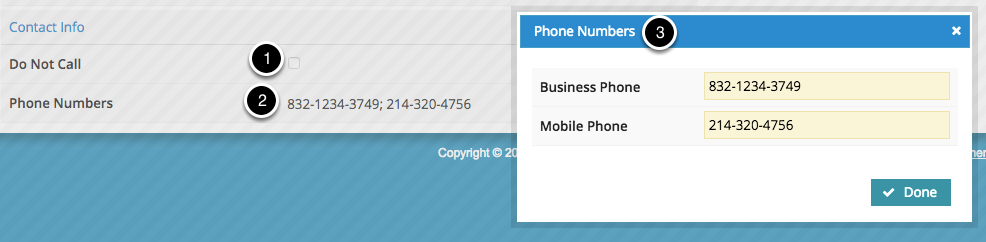
- If Do Not Call is unchecked, the Template Field will list the Phone Field(s) you put in the Template.
- Assuming your Field Editor’s Default Mode is Read with Inline-Edit, you can double-click on the Field or click on the pencil icon to edit the Field.
- A pop-up window will appear when you double-click or select the pencil icon.
Step 4: Test it out by checking the box on the Do Not Call Field to hide the phone numbers.
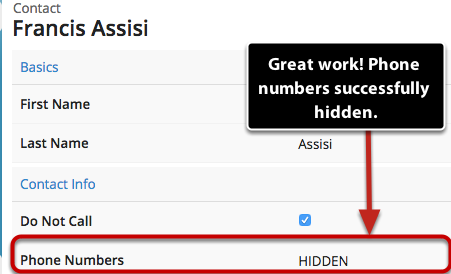
Click on the pencil beside the Do Not Call field to edit it. Check the field.
The Phone field should now be HIDDEN. If this is not the case, repeat Option B Steps 1-2 paying careful attention to the template syntax in Step 1.
How to Configure Field-Level Security for the DoNotCall Field on the Contacts Object.
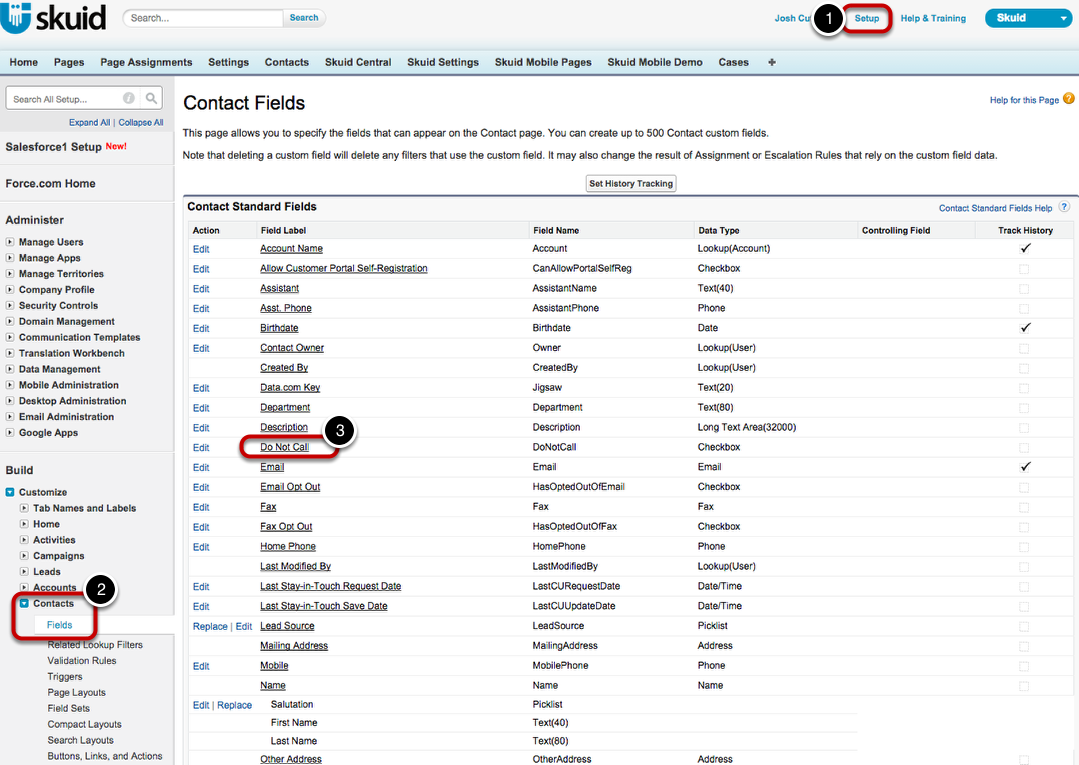
- Go to Setup.
- Enter DoNotCall in the Search All Setup… bar or click on Customize > Contacts > Fields.
- Click on the Field Label for Do Not Call to go to the properties for this Field.

- Click on the Set Field-Level Security button.
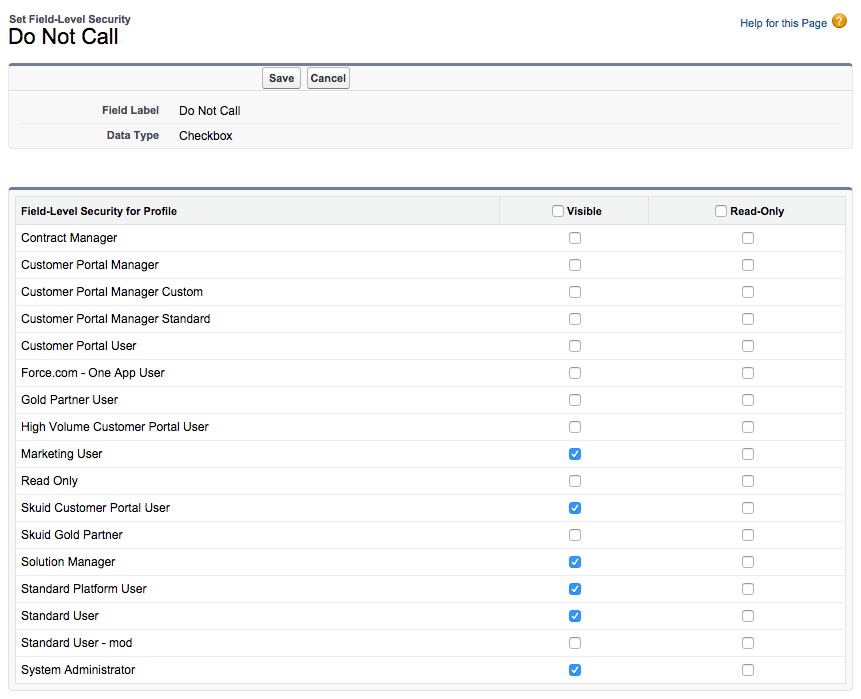
- Make sure that any Profiles that will be editing and/or viewing this Skuid page have the Visible checkbox checked.
- Click on Save when you’ve completed your changes.