Show Products in an Opportunity Page
This tutorial shows how to create a Products related list tab on an Opportunity page. The “Products” list is actually accessed through the Opportunity Line Item Object.
For this tutorial, you need to start with an Opportunity Detail/ View Page.
See the URL parameter documentation for more information. You can also use page templates to create an Opportunity Detail page.
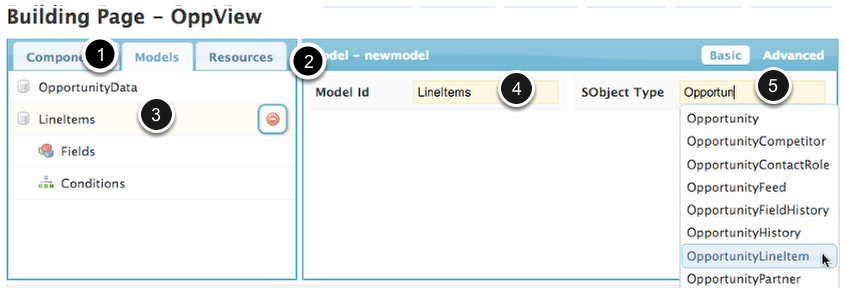
Step 1: Click Models and then click Add Model to add a model for products
In Advanced, set Ordering preferences.
You can choose the default order for the Line Items in this page in Fields to Order Records By. We have ours ordered by: SortOrder, PricebookEntry.Product2.Name (make sure you include these fields in your model!)
Include the relevant fields in your Line Item object, including any fields you chose to Order by.
- Under the Line Items model, click Fields to pull up the list of Opportunity fields.
- Check to select fields. (You can also use the search bar to help you find fields).
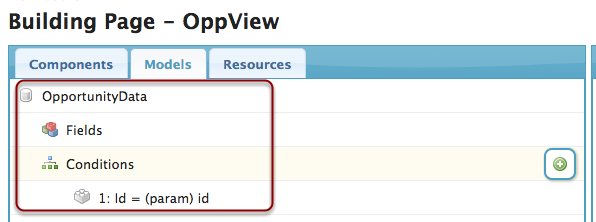
Add a condition that will only include Line Items associated with the page opportunity.
- Under Line Items, click Conditions > Add (+).
- For field, choose Opportunity Id.
- Click Value and choose URL parameter as the content and id as the parameter.
This condition will ensure that this model only includes line items that are associated with the main opportunity on this page (the one whose id is in the url).
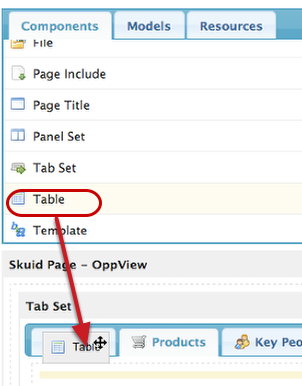
Step 2: Drag and drop a table into your Products Tab.
This table will house the list of line items.
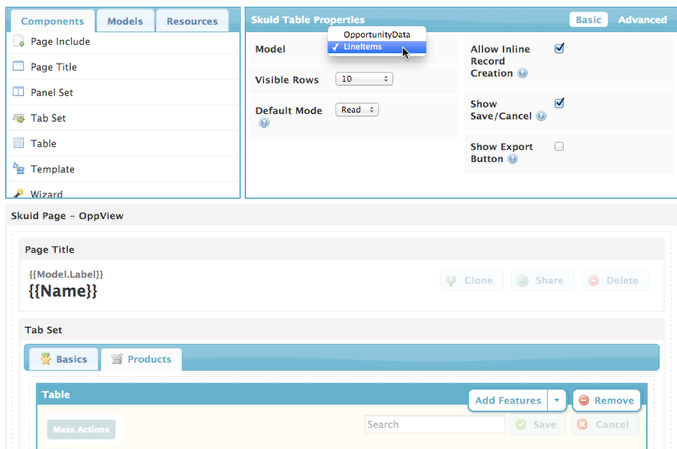
IMPORTANT: Set the table to the Line Items Model.
Otherwise you won’t be able to drag and drop Line Item fields in.
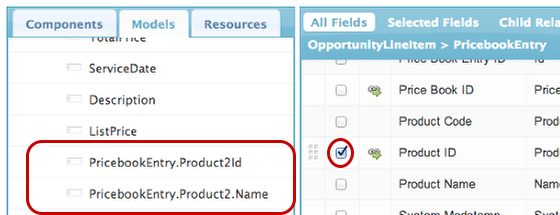
Step 3: First we’ll drag in the Product field. But where is it? Click on the Price book Entry ID lookup…
When you click on the arow-combo box, you get to see all of the fields in the lookup object - and include them!
Click the Product ID field, and Name fields will be added automatically.
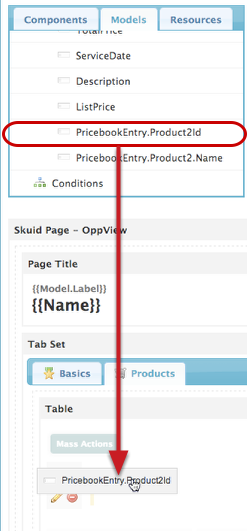
Then, drag the Product ID field (i.e. PricebookEntry.Product2Id) into the field editor.
- Drag this field from the left hand column. Because you got it through a lookup, if you drag it directly from the right, it will do funky things.
- Why are we dragging the ID field and not the name? The ID field is how Salesforce identifies the record. Skuid automatically displays the name in this field, instead of the ID and on your finished page, this field will be a link to the Product.
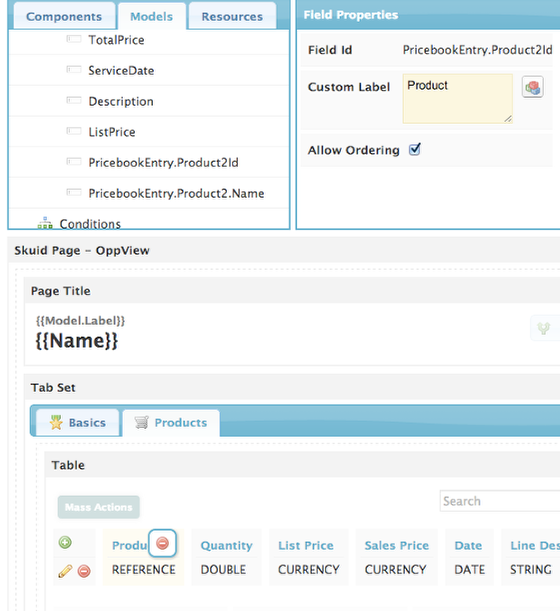
In the table, this field will be called “Product ID.” Click on it and change its name to Product.
You can also click to allow ordering by this field.
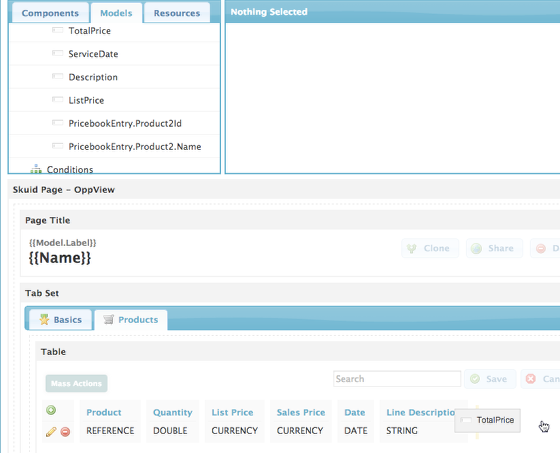
Step 4: Drag and drop the rest of your fields into the table.
Click on individual fields to edit their properties.
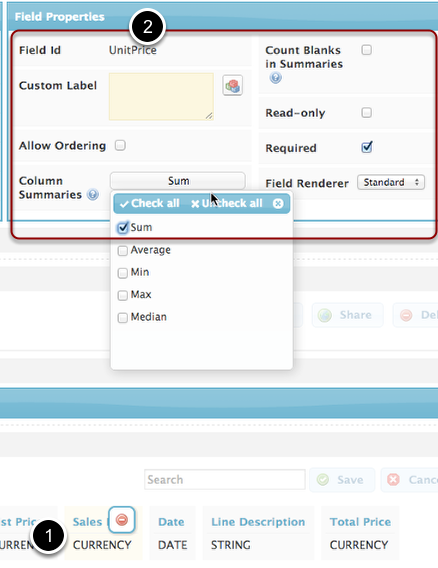
By clicking on a field, you can not only re-label it, but also allow ordering by this field, make it required, and/or read only. For number fields, you can also click to include Column Summaries like Sum, Average, and Median.
For your reference, the way we do it on our Opportunity Detail Page:
- Product ID: Allow Ordering
- List Price: Read Only
- Sales Price: Sum, Required
- Date: Required
- Total Price: Sum, Read Only
We’re about to do some awesome things to this table. But first, click Save.
Step 5: Create an Add Product button.
Because the Opportunity Model is complicated, we don’t want users to be able to create new Line Items from this list. It would be better if they went through the standard Salesforce New Line Item process (or one we’ve created ourselves using the Wizard component).
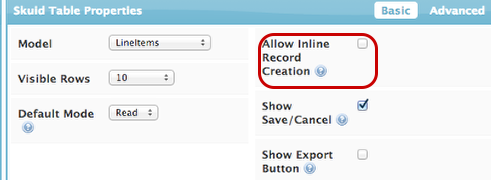
So in Table Properties, uncheck “Allow Inline Record Creation.”
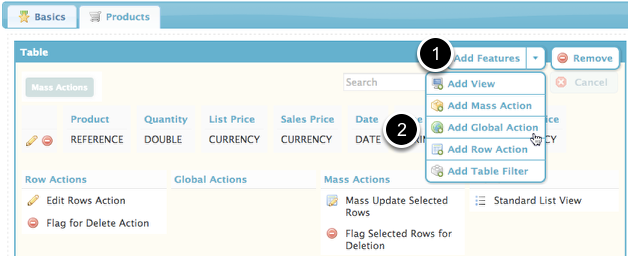
Click Add Features > Add Global Action.
A Global Action appears above your table, but doesn’t apply to any of its rows.
Create your Add Product Action.
Choose Redirect as the action type.
Label your new action, e.g. Add Product.
Add a helpful icon, like ui-silk-cart-put
The URL field is where you enter either the URL of the standard Salesforce action or your own process for adding an Opportunity Line Item. The standard Salesforce url should be:
/p/opp/SelectSearch?addTo={{$Param.id}}&retURL=%2F{{$Param.id}}
The {{Templates}} in this URL are pulling in the ID field from this Page’s URL, so that the system knows which Opportunity you’re adding a Line Item to, and which Opportunity you want to return to.
Step 6: Create another Global Action to Edit All Line Items.
Choose Redirect as the action type.
Label your new action, e.g. Edit All.
Add a helpful icon, like ui-silk-table-edit
In the URL field, we link to the standard Salesforce url (where OpportunityData is the name of your model):
/oppitm/multilineitem.jsp?oppId={{#$Model.OpportunityData.data}}{{Id15}}{{/$Model.OpportunityData.data}}&retURL=%2F{{$Param.id}}
See how we used {{#$Model.OpportunityData.data}}{{Id15}}{{/$Model.OpportunityData.data}} instead of {{$Param.id}} to pull in the 15 digit ID instead of the 18 digit one? Some Salesforce actions just use the 15 digit ID but the 18 digit one is the one in this pages URL parameter. So you can use template syntax like this to pull in other fields from your models (like Id15) as URL parameters. Make sure that you substitute the name of your model for “OpportunityData,” eg. {{#Model.MyModel.data}} etc.
Step 7: Create another Global Action to Choose Pricebook.
Choose Redirect as the action type.
Label your new action, e.g. Choose Pricebook.
Add a helpful icon, like ui-silk-book-edit
In the URL field, we link to the standard Salesforce URL:
oppitm/choosepricebook.jsp?id={{$Param.id}}&retURL=%2F{{$Param.id}}&sUrl=%2F{{$Param.id}}
Step 8: Create another Global Action to Sort / Reorder Line Items.
Choose Redirect as the action type.
Label your new action, e.g. Sort / Reorder.
Add a helpful icon, like ui-silk-arrow-switch
In the URL field, we link to the standard Salesforce URL:
/oppitm/lineitemsort.jsp?id={{#$Model.OpportunityData.data}}{{Id15}}{{/$Model.OpportunityData.data}}&retURL=%2F{{$Param.Id}}
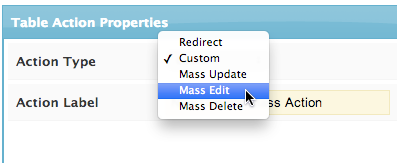
Step 9: Click Add Features > Add Mass Action to add a Mass Edit action.
You can rearrange your actions in the table.
Step 10: Click Save, then click Preview.
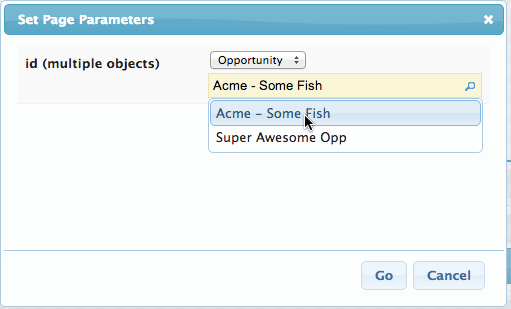
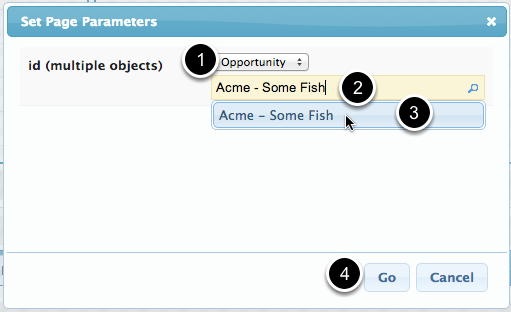
Choose which Opportunity to preview this page for.
- If prompted, choose the primary page object (Opportunity).
- Start typing in the name of an Opportunity.
- Select the appropriate Opp from the Lookup LIst.
- Click Go.
Success! Your Products tab will be displayed.
Click on your actions to make sure that they work. If you encounter any difficulties make sure that you copy and pasted the Redirect URLs correctly and that the fields references in the {{templates}} are the right fields. You can also follow the Troubleshooting instructions below.
Want to go deeper? Check out the skuid community to learn how to use custom JavaScript to:
Troubleshooting
You can ask questions, browse answers, and report problems at community.skuid.com.
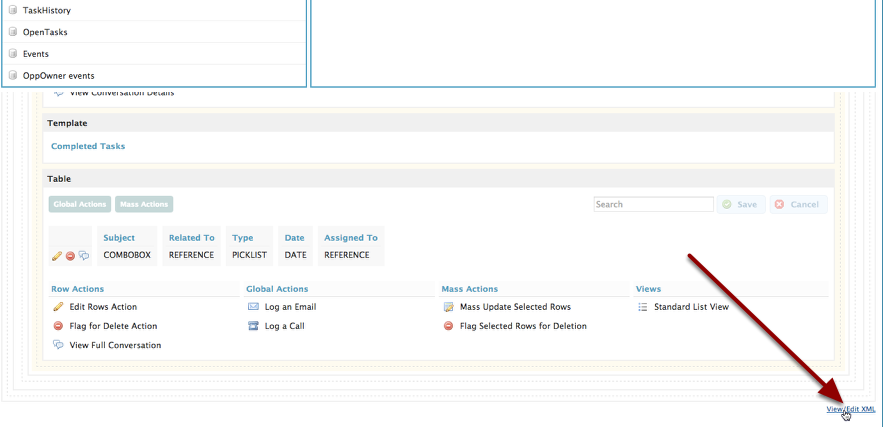
- You may not have noticed, but the Skuid page builder has a View/Edit XML link at the bottom lefthand corner that’s active after you saved. This is a great way to <!– comment out parts of the page that you think might be causing problems –>
- Select all of the XML and copy and paste it into your email. You can also put it in <pre><code> Your xml goes here </code></pre> html wrappers to share it on the community. This will help us solve your problem faster.
- Or you can cheat: get the correct XML for this page - and copy & paste it into a new page in your own org - in our Pages Repository . (The Products Tab is available in the Opportunity Detail Starter Page.)
