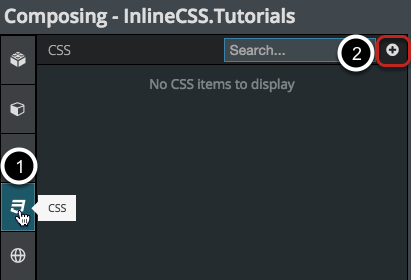
Including Custom CSS in a Skuid Page
This tutorial shows you how to add a custom CSS snippet in an individual Skuid page. This is the ideal way to implement small styling changes that will only affect one page.
For more complex use cases, you can declaratively compose CSS Themes in the Skuid Theme Composer and link these to external/static resources and extend them with custom snippets. See Styling Best Practices for more information about where you can add CSS in Skuid and find out which method works best for your scenario.
Much of Skuid is based on the jQuery UI CSS, but for much of the Skuid core components, we have our own CSS which drives them, and so you have to determine the CSS classes we’re using for a given area of the page and then override them.
Step 2: Choose the Resource Location.
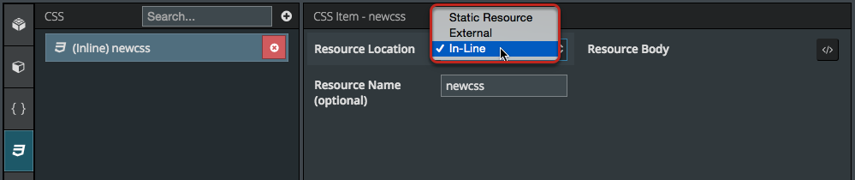
Select the Resource Location.
A. For Static Resource, you will be able to enter the Resource Name and the Namespace of the CSS resource.
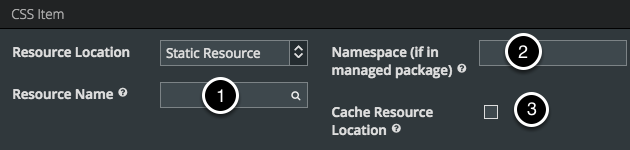
- Start typing the Resource Name to select one of your previously uploaded CSS files in Static Resources.
- Add a Namespace (only necessary if that Static Resource is included in a managed package).
- Do not cache the resource location unless this resource is very stable and will not be changing.
B. For External, you will be able to enter the URL of the CSS resource.
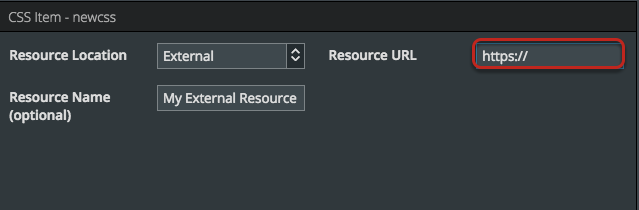
- Make sure you use https for the secure URL or this won’t work, because Salesforce® wants to keep you secure.
C. For In-Line, you will be able to enter custom CSS in the Resource Body (click the script button to open the resource editor).
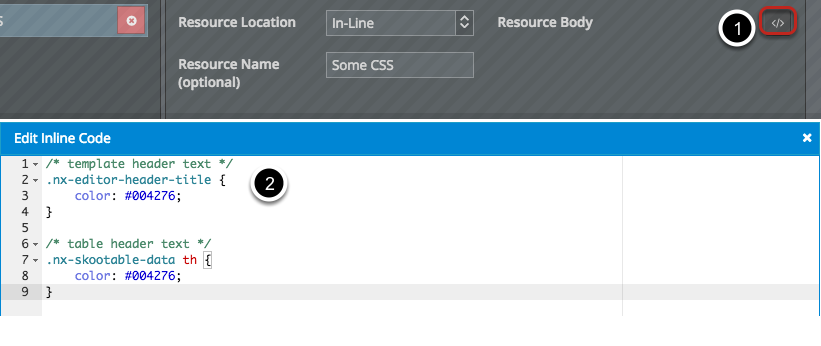
- Click to open the resource editor.
- Click to start entering your CSS.
For example, this CSS will modify some of the Skuid elements:
/*Make buttons and search bar float left*/
.nx-header-right {
    float: left;
}
/*Hide table footer*/
.nx-list-footer {
    display: none;
}
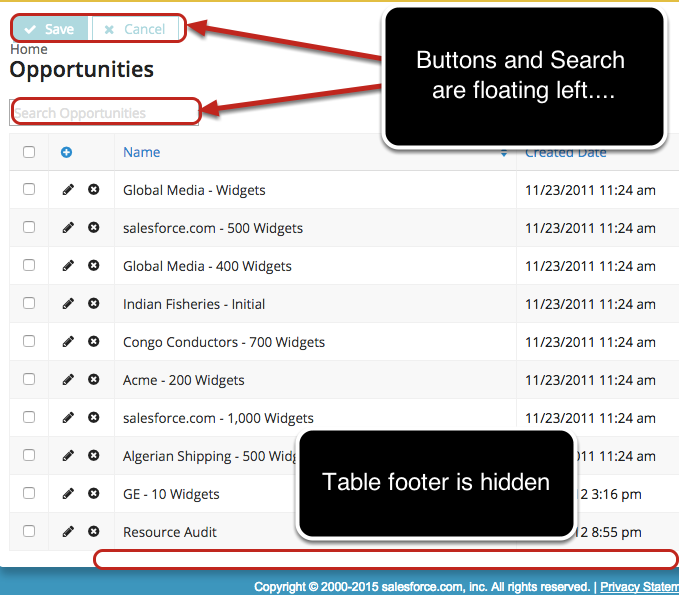
Step 3: Click Save, and then Preview. Your custom CSS will be displayed!
Step 4: Tweak your CSS.

As you start changing the Skuid CSS, you may notice elements that you want to change (or forgot about). When this happens, use your browser’s developer tools to Inspect the Element.
In Chrome, Safari or Firefox:
- Right click on the element.
- Choose Inspect Element.
In Internet Explorer, you can go into Tools > Developer Tools (F12) to view the page CSS.
Experiment with different styles.
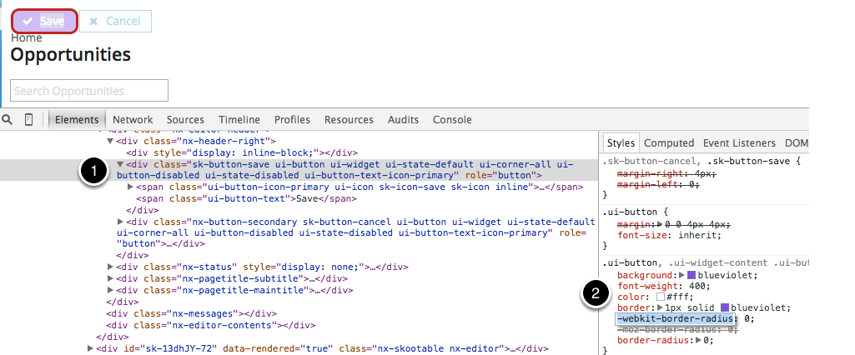
- Narrow down to the appropriate element by using the up and down arrow keys.
- You can type in new styles to experiment with. When you find one you like, you can incorporate it into your stylesheet, or inline resource. The new rule we decided on here was:
/*make the buttons purple, please*/
.ui-button, .ui-widget-content .ui-button.ui-state-default {
    background: blueviolet;
    border: 1px solid blueviolet;
}
Applying Custom CSS to specific components.
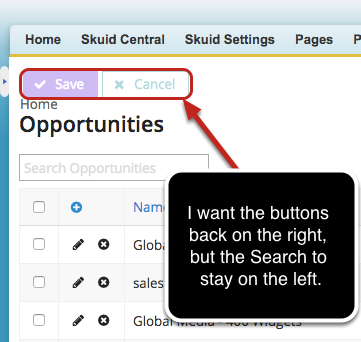
If you want to customize a component on your page, but you don’t want every component of that type to be customized in that way, you can easily specify the table(s) you want using either a Unique Id or a CSS Class.
In this example, I used the .nx-header-right class to change the position of both the buttons and the Search box, but I don’t like the way the buttons and the subtitle cram together so I’m going to put them back on the right, but I want the table search to stay on the left.
Using Unique Ids and CSS Class in your In-Line Resource
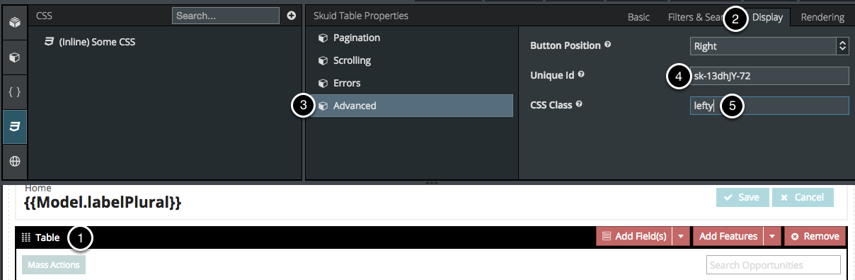
- In your Page Builder go to the component to which you wish to apply the CSS and click on it. (In this case, it is the table where we want the Search bar to float left.)
- Click Display.
- Click Advanced and you will see options to name either a Unique Id or a CSS Class.
- Using Unique Id will allow you to specify one component on your page to apply the CSS. By default all components are assigned a unique Id, but you can edit this field to make the Unique Id something easier to remember (e.g. MyMostSpecialTable)
- Using CSS Class is different from Unique Id in that it gives this component’s DOM element a CSS Class. This means that you can create an In-Line Resource with the name “lefty” (or whatever name you choose) and use it in multiple components on your page.
Once your component has an Id/name you need to go back your CSS resource and customize!
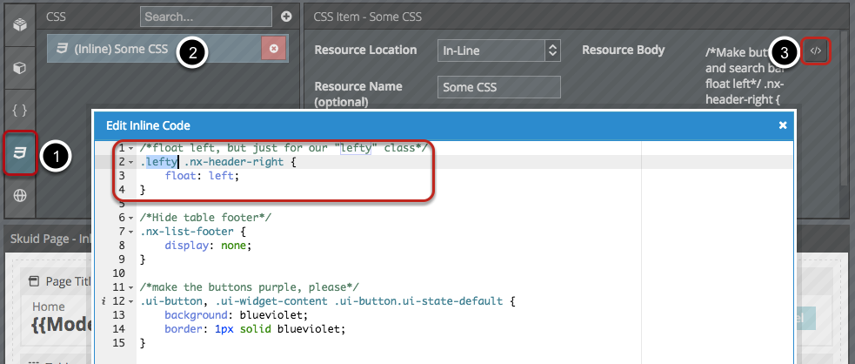
- Go to CSS.
- Open your inline CSS, or click on the plus sign to create a new resource.
- Click to open the resource editor.
- In this example we are going to have the header items in this Table (and any other component with they “lefty” class) float left. Add a period to pull in your class name.
/*float left, but just for our "lefty" class*/
.lefty .nx-header-right {
    float: left;
}
- If you wanted to apply this CSS to just one component using the Unique Id”MySpecialTable,” you will use a “#” (hashtag) to pull in your table. So your code will look like this:
/*float left, but just for our special table*/
#MySpecialTable .nx-header-right {
    float: left;
}
Note
Keep in mind that you still need to be aware of parent/child relationships when writing your CSS code.
Success! The Table Search is floating left but the Page Title buttons are staying right!
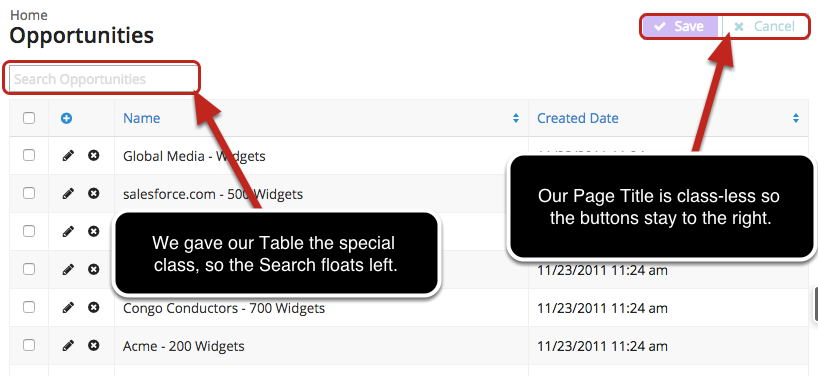
The Page Title is like a communist utopia in that way.