Master and Child Pages
Created a great page with a killer layout, branded images and header, perfect component set, and solidly built models? Re-use that content by creating a Master Page. A Master Page functions like a template for its Child Pages. This allows you to compose an outstanding collection of branded, functional pages without having to repeat your work on every page! The best part is that you can keep on editing the Master Page at any time, so you can tweak it as the needs of your users change.
Master Pages function like templates for their Child Pages.
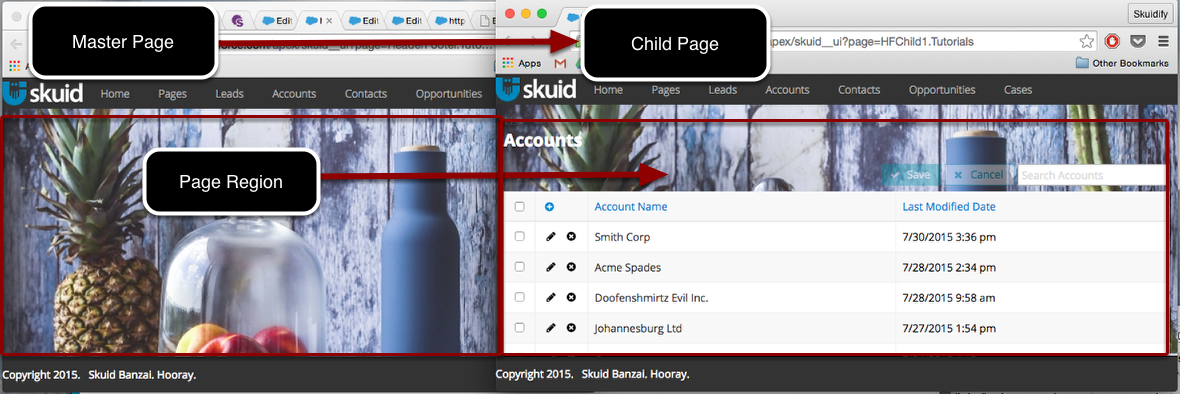
Add the Page Region Component to your Master Page wherever you’ll want to have page-specific content on each Child Page.
Step 1: In Skuid Page click Available as Master Page.
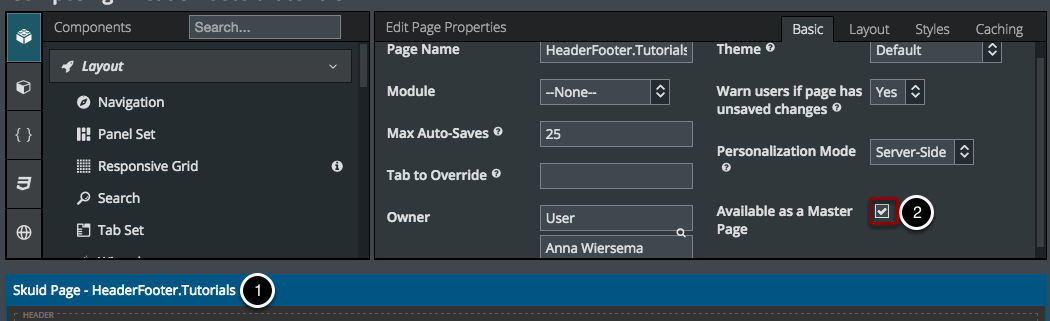
You will now have access to Child Pages and Page Regions.
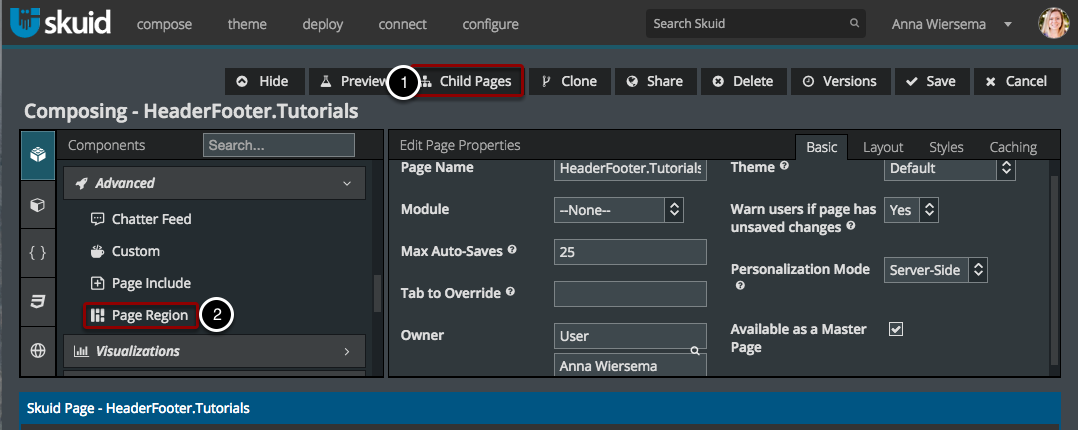
Step 2: Drag and drop Page Regions into the parts of the pages that you want to be customized on Child Pages.

- In this example, we’ll just add one Page Region in between the Header and Footer for the body of the page.
- Page Regions will not be configurable on this Master Page, but they will be configurable on its Child Pages.
Step 3: Create and view Child Pages.
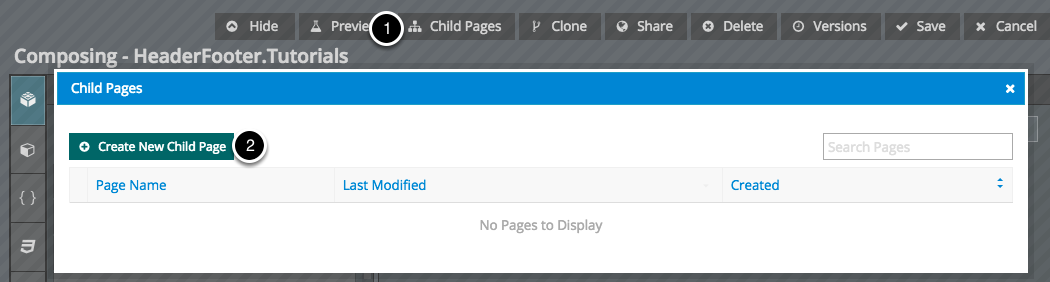
- Click Child Pages. All of this page’s existing Children will be displayed here.
- Click Create New Child Page. After you name the Child, it will be opened in another tab (so you can easily go back and forth between the Master and the Child).
You can also set master page when creating a new page.
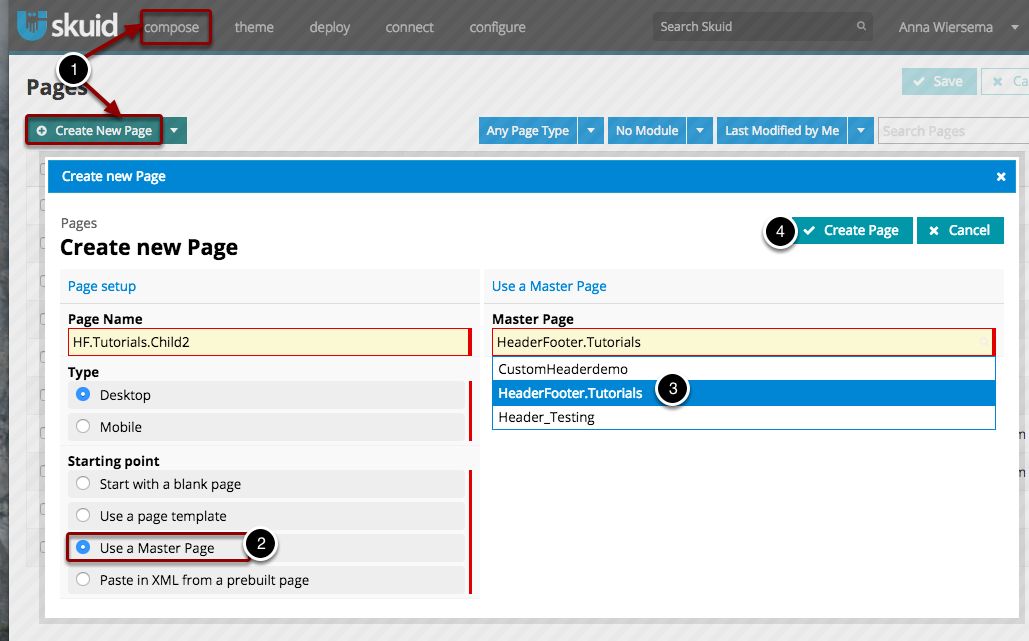
- Click Compose > New Page, or Compose > All Pages > Create New Page.
- Select Use a Master Page as the starting point.
- Choose the appropriate Master Page.
- Click Create Page.
Step 4: Edit the Content of Child pages.
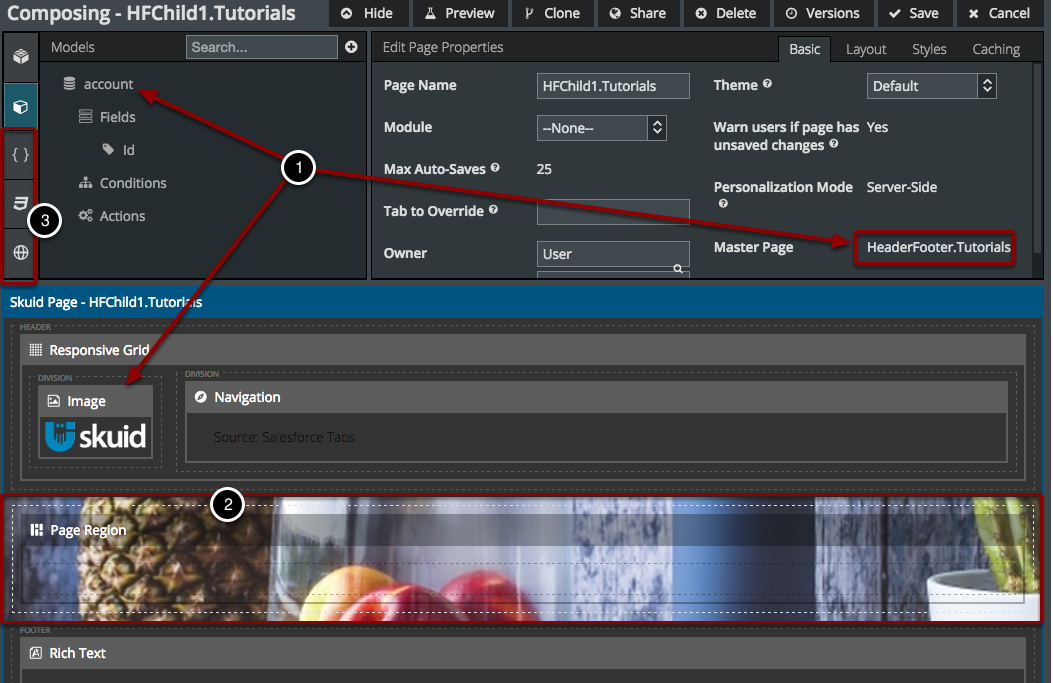
- All your components, models, and page settings from your Master Page will be visible, but not configurable. You can go back to your Master Page at any time to tweak it.
- You are free to add more Models to this page, and add Components to any Page Region.
- You’re also free to add JavaScript/CSS resources and Custom Labels specific to your Child Page. Any of these types of resources included in the Master Page will be shown in the Child Page, but grayed out, just like the Models.
NB: Remember, to see the latest version of your Master Page, you need to first save your Master Page, and then refresh your Child Page. (Yes, I did learn this the hard way).
Cool Use Case: Keep your own snippet library, custom labels, custom CSS, or third party JS/CSS includes on your Master Page. No more copying/pasting that Custom Field Renderer! No more updating that Custom Field Renderer across all 17 pages that use it! You could accomplish this by putting your Pages in a Module too, but that requires putting all your JS/CSS into a single file. This way, you can split things up a bit more.
Special Considerations
- A Child Page cannot be a master page. Sorry, no Grandchildren Pages available at this time.
- You can’t make an existing page a Child Page; you have to create a new page because Child Pages have a different XML structure.
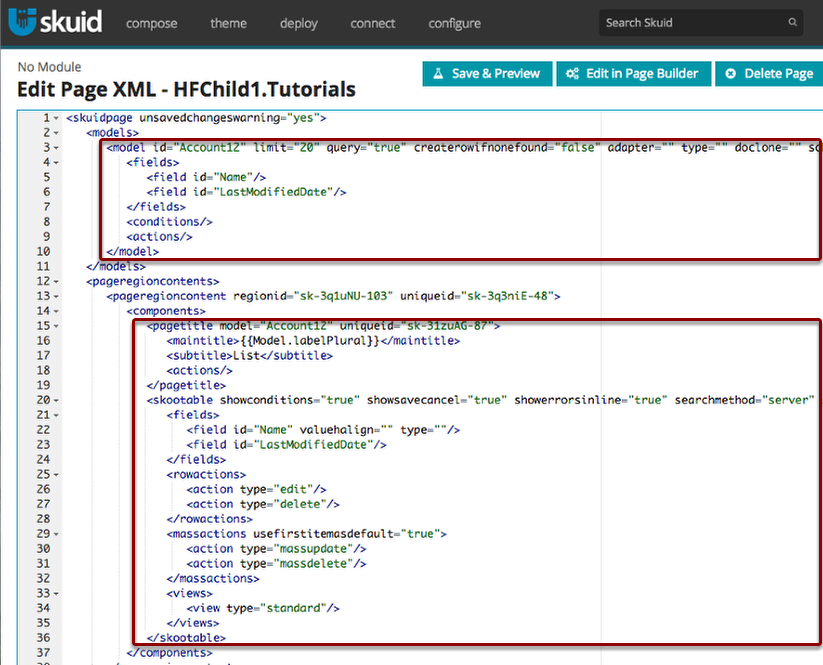
- However, you can open the XML editors on both pages and copy and paste portions of an existing page’s XML into a Child Page’s XML. First, copy the models you want into the <models> section and rename any models that have the same name as any models on your Master Page. Then, in the <pageregioncontent><components> section, paste in the components from your existing page and remap them to your new model names as necessary. (I learned that one the hard way too).
- There will be a <pageregioncontent> node for each of the Page Region components in the Master Page, so you can either paste all the component XML into one, Save, and then drag/drop components around in the App Composer, or go ahead and arrange them in the XML.
Take it to the next level. Check out Compose a Branded Header and Navigation for a more detailed example of how to build a master page with a custom header and navigation to apply to all its children.