Pages
A Skuid page is an arrangement of components, models, and other resources.
Create a Skuid Page
You can create a Skuid page from three different locations within Skuid:
- From Skuid Central, click Create a page.
- From the Pages screen, click Create New Page.
- From the Navigation bar, hover over Compose and click New Page.
Skuid opens the Create New Page dialog. Edit:
Name: A practical name for the page.
Starting Point: There are several ways to start a page:
Start with blank page: Open a blank Skuid page.
Use a page template: Create a Skuid page using a Skuid-provided page template.
Note
This feature is not available in Skuid Platform.
Use a Master Page: Create a Skuid page from a master page.
Note
You must have a previously-created master page available to select this option.
Paste XML from a prebuilt page: Opens a dialog box with a Page XML entry field for pasting copied XML. (Page XML can be seen and copied by clicking View/Edit XML in the App Composer.)
Find Sample Pages: Search through sample pages available in Skuid’s Sample Pages GitHub repository. Click the desired page to open it, copy its XML, and then paste the XML into the entry field.
Note
If the uploaded XML includes a model attached to a data source that is not present in the current site, Skuid will invite you to Reassign Invalid Data Sources.
For each invalid data source, Skuid provides the Current (Invalid) Data Source, and allows you to select a possible replacement from a Replacement Data Source picklist. Select a data source that matches the intent and service of the original page’s as closely as possible.
Upload XML file: If you have a Skuid page saved as an XML file on your machine—perhaps to share with other users or downloaded from elsewhere—this option allows you to search for that saved XML file and upload it.
- In Upload XML dialog box, click Upload to search for and upload an XML file.
Note
See note above about Re-assigning Invalid Data Sources.
Types of Skuid Pages
Some Skuid pages are very simple, with one or two components and models, while others can have multiple elements working in tandem to support very complex processes from a single location.
Tab/List pages
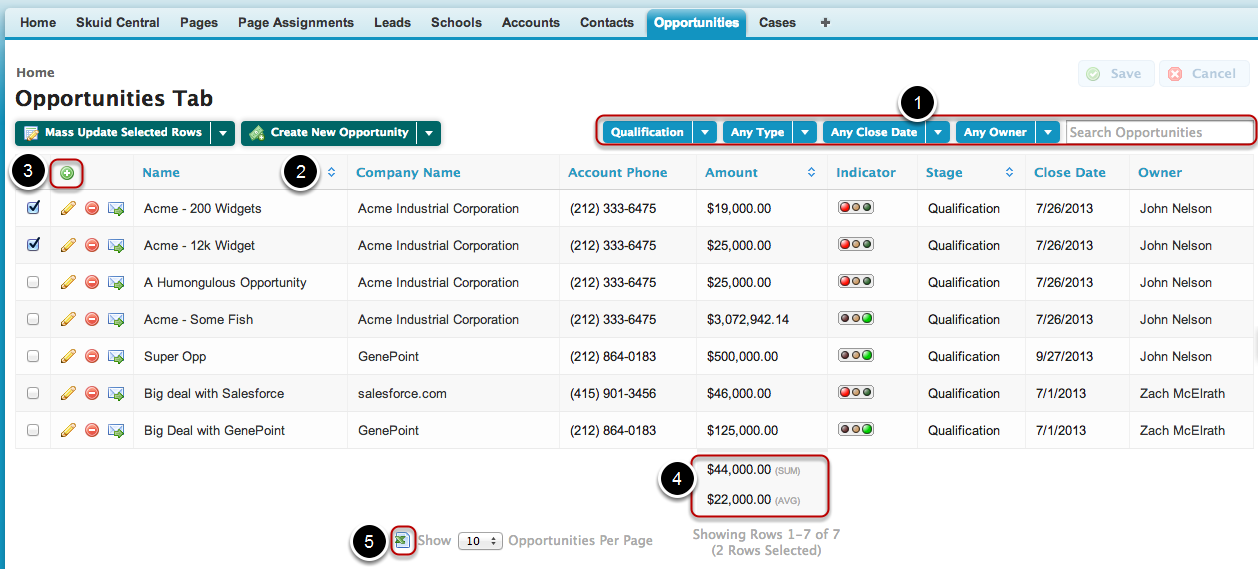
Skuid tables make it possible to do even more from the tab page.
- Search and filter the records in your tables to narrow down the list.
- Sort tables based on whichever fields you want.
- Click to add a new record to this table. (This button can be removed)
- Add summaries on any number field.
- Export this table as a spreadsheet.
Edit records without leaving the list page
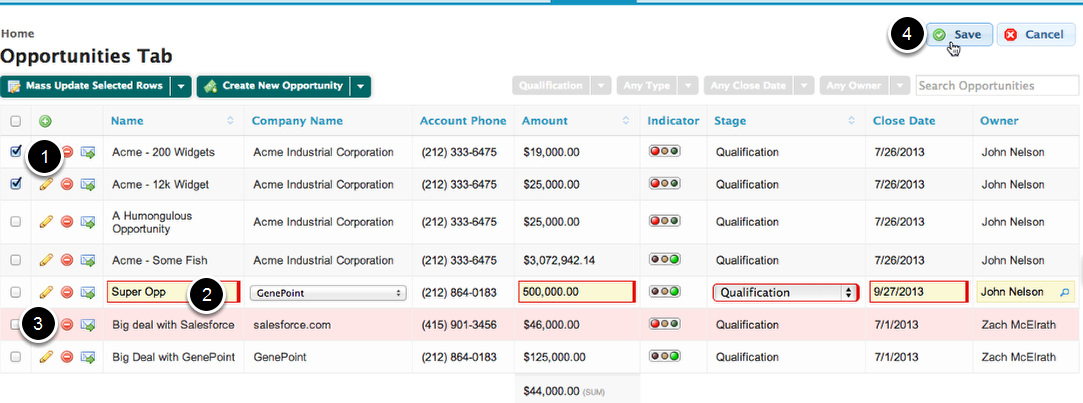
All of these actions on a table can be removed or added as you wish. You can also create your own table actions.
- Use checkboxes to mass update/edit/delete records in a list.
- Double click to edit individual records inline.
- Click on the red icon to delete records.
- Save or Cancel your changes.
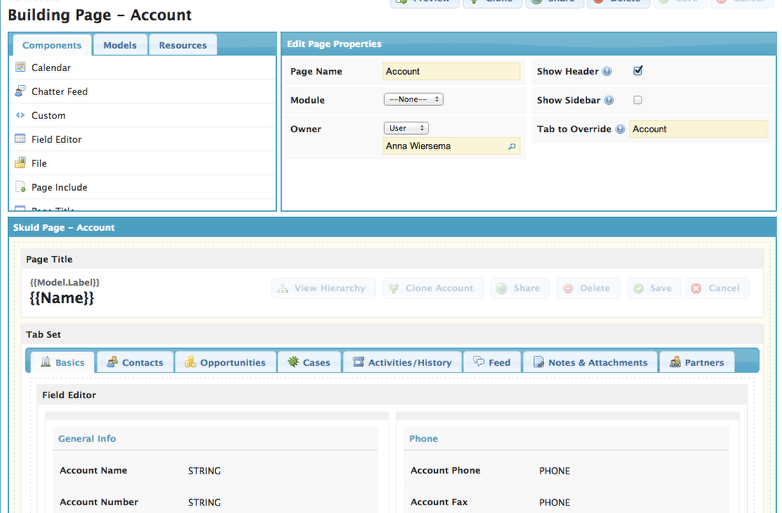
Detail Pages
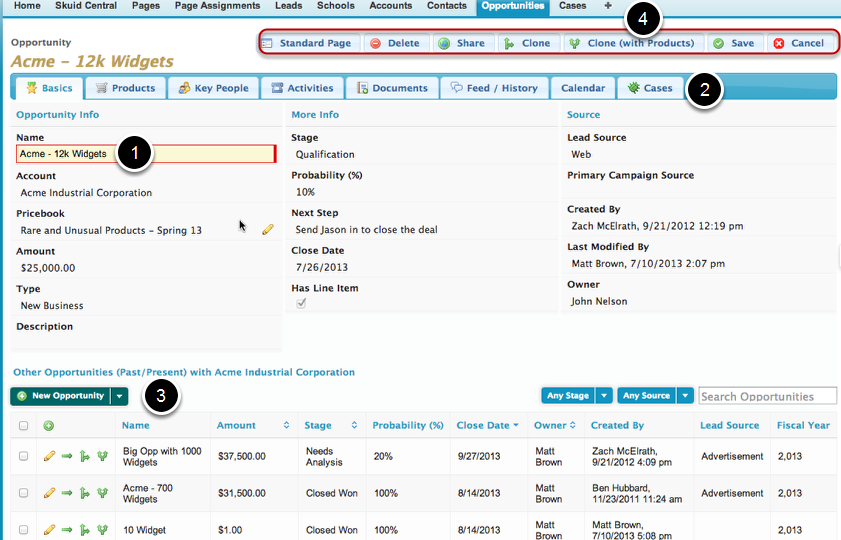
- Easily edit record details with the field editor component. Add as many columns as you want.
- Add tabs to organize your related lists and cut down on scrolling.
- You can also include custom related lists, or even unrelated lists on your pages. This is a related list we “made up” - other opportunities associated with the same account.
- Include a suite of standard and custom actions in your pages.
Calendars
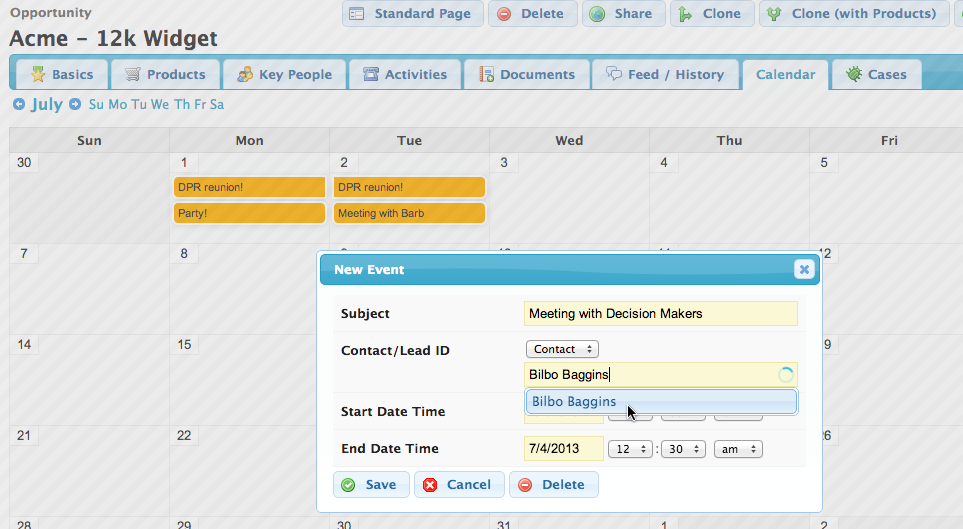
Skuid’s Calendar component makes it easy to track events and timestamped data. View Calendar by month, week, and year. Click to add events.
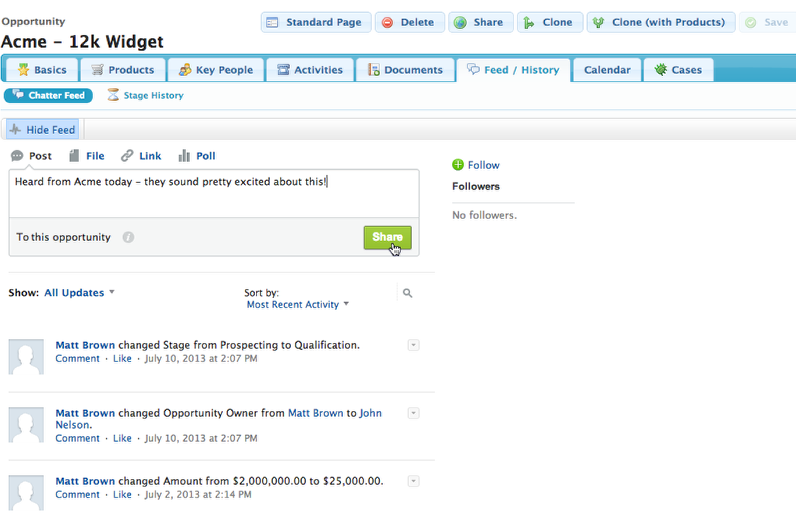
Custom Popups
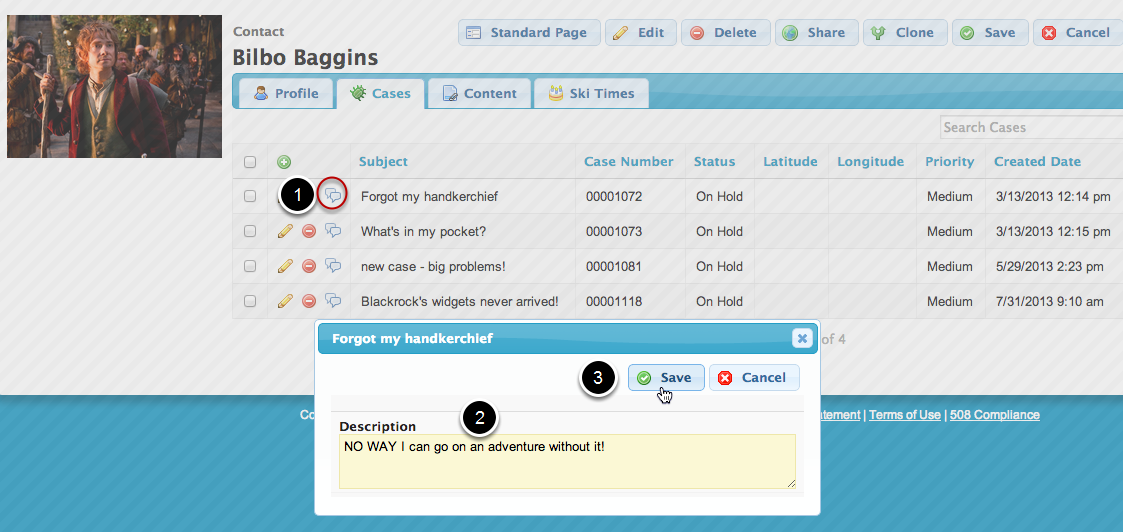
Create custom popups with Skuid. Now you can view and edit related record details without leaving the page.
Queue Pages

The Queue component makes it easy to interact with records in a list. Just choose the record you want, and its detail page will be displayed in a related page include.
New Pages
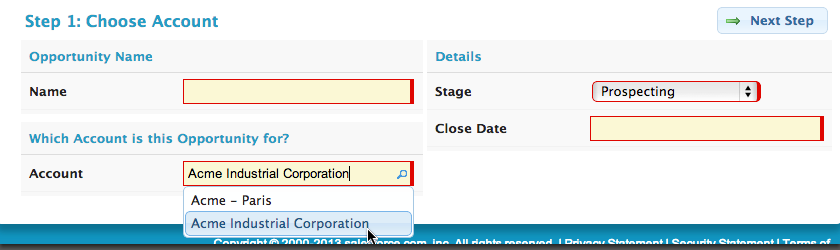
With Skuid you can create custom New Pages, Clone Pages and Wizards to clarify your business processes.
Continuous Improvement
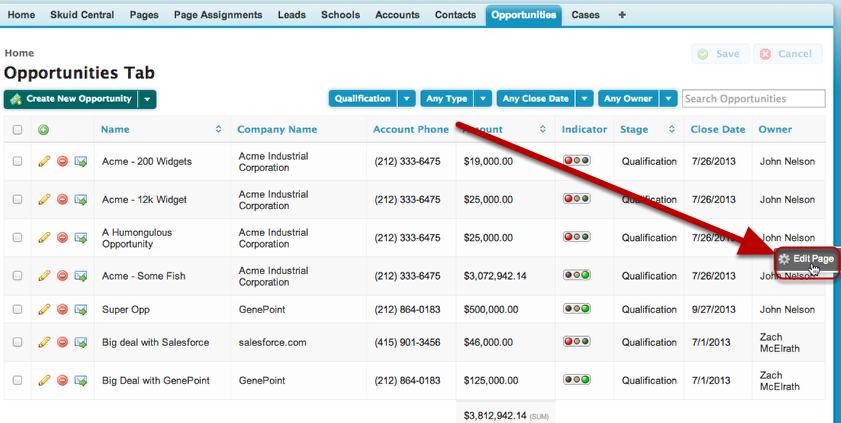
Even when pages are in production, you can always click Edit Page to go back into the page builder and update them. You can use CSS to rebrand your pages, and with Skuid’s Javascript API, the possibilities are virtually infinite.
Share a Skuid page between orgs
With Skuid you don’t have to use a Sandbox if you don’t want to! You can do lots of Skuid development without any new VF, Apex, or resources at all; you can develop and test pages in Skuid and then go live with them when you’re ready. If you are building a managed package, you can actually include your Skuid pages and overrides in your package resources, and they will all be loaded into customers’ orgs automatically. For an overview of this, see the tutorial Why build your app with Skuid?.
The Skuid XML Editor enables you to take any page that has been created in Skuid and copy and paste it into your own org. Check out our page repository to find custom pages and to share your own pages with other Skuid users.
To deploy Skuid pages across orgs, e.g. between Dev, Testing, Q/A, Production, you can do one or both of two things:
For Single Pages in your org (or a handful of pages): follow the instructions in the Share a Skuid Page between orgs tutorial (described below).
For All of the Pages in your org: follow the instructions in the Export All Pages and Import Pages tutorial.
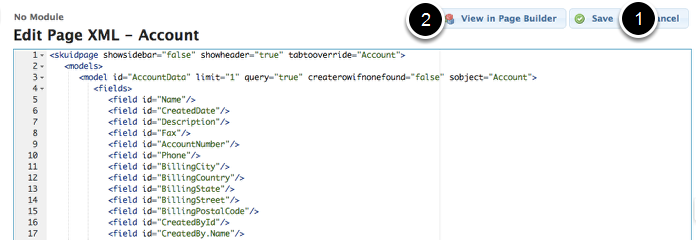
Step 1: View/Edit XML
In the Page Composer for the page you want to export, click View/Edit XML at the bottom of the page.
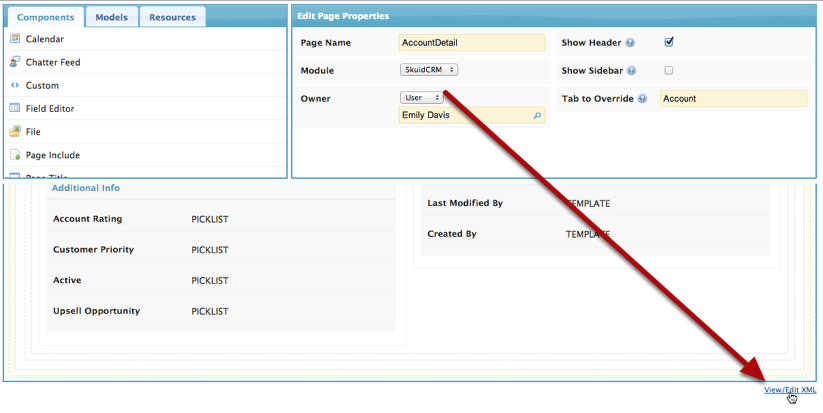
You must Save to activate this link.
Step 3: Switch orgs
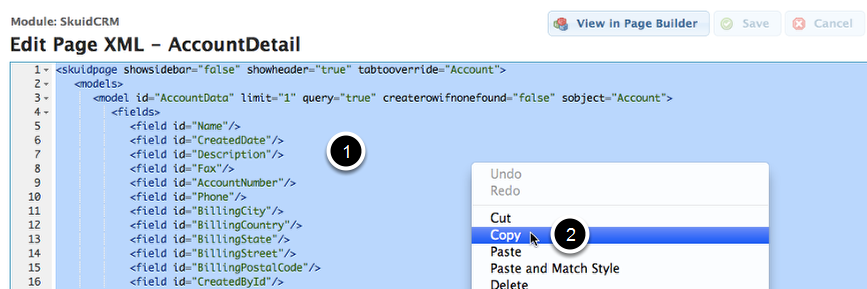
Open the page editor for the page you want to update, and click View/Edit XML.
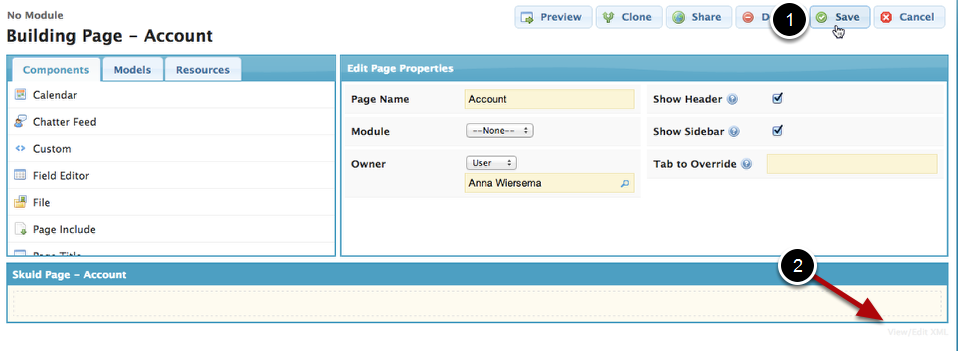
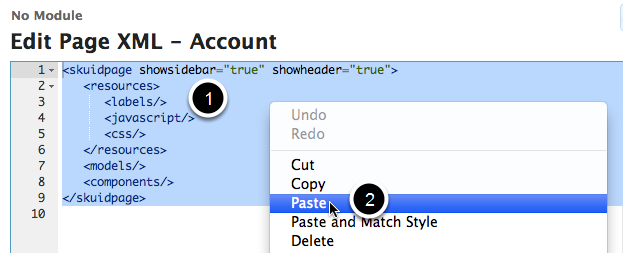
In the desired org, create a new page, or open the page that you want to update. Click Save to activate the View/Edit XML link.
Step 5: Save
Save your changes and return to to the Page Builder.
If the page XML is invalid, you won’t be allowed to Save:
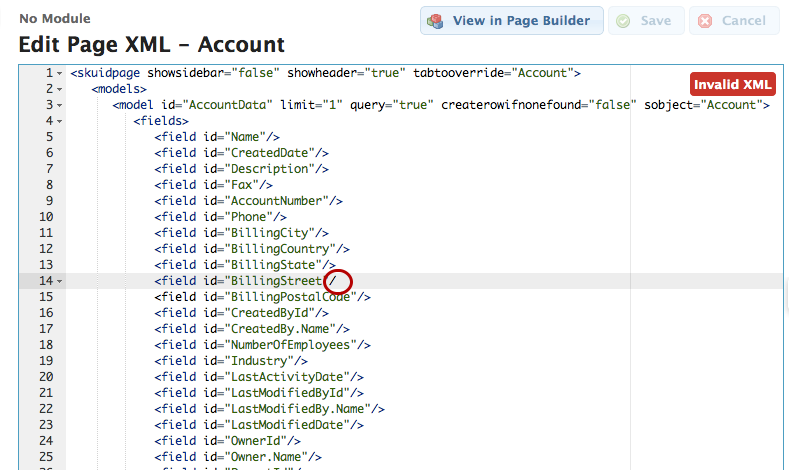
Go back to the first page, and make sure that you copied all of the XML for this page. If you’re importing a page created by another Skuid user, you can get in touch with them and ask them to help you debug it.
Success!
Congratulations! You’ve successfully imported this page into a different org.
Don’t forget to check out our page repository on Github to find custom pages and to share your own pages with other Skuid users.
Salesforce Custom Labels
Note
Salesforce Custom Labels are currently only available when using a Salesforce on Salesforce.
Skuid allows you to use Salesforce custom labels, along with the Translation Workbench, to display public-facing text in users’ preferred languages. Learn more about creating custom labels in Salesforce.
For each custom label requested, Skuid will determine if there is a translation corresponding to the language of the user viewing the Skuid page. If there is, Skuid displays the translated text to the user.
Note
It is considered best-practice to use Custom Labels wherever displaying custom text to your users. Custom Labels support effective localization.
To access custom labels:
- In the page properties, click the Labels tab.
- Click on Add Label.
- Label Id: Enter the label’s name as it appears in Salesforce’s Custom Labels page.
Note
To include a custom label in a template, use {{$Label.<LabelName>}}, e.g. {{$Label.Save}}.
For more information about using custom labels in Skuid, see Label Localization.
Troubleshooting
Recovering Deleted Pages
Skuid on Salesforce Only
Accidentally delete a Skuid page? You may still be able to get it back if you’re on Salesforce Classic ! Since Skuid pages are stored as data records, check your Salesforce Recycle Bin to see if you can undelete the page.