Keyboard Shortcuts and Accessibility
Keyboard Shortcuts
You can define hot keys that trigger actions on your Skuid page from the keyboard in the following components:
- Page title buttons (e.g. Make Ctrl+S perform global save.)
- Wizard step buttons (e.g. Make Ctrl+> go to the next step and Ctrl+<go to the previous step.)
- Table Mass actions and global actions (e.g. Make Ctrl+W mark all selected opportunities closed won, or make Ctrl+N add a new row to table.)
Hotkeys will only work if the Ui element that triggers the action is visible on the page. If you have multiple tabs with tables on each tab, Ctrl+N can be defined to add a new row on all of them, but will only work on that tab that is active.
The Skuid App Composer now responds to hot keys:
- Ctrl+S, ⌘+S: Save
- Ctrl+P, ⌘+P: Preview
- S+E: Expands the App Elements and Properties panes
- S+C: Collapses the App Elements and Properties panes
Accessibility
For users who require alternative accessibility options, Skuid pages can also be navigated by keyboard.
A Quick Look at Adding Keyboard Shortcuts.
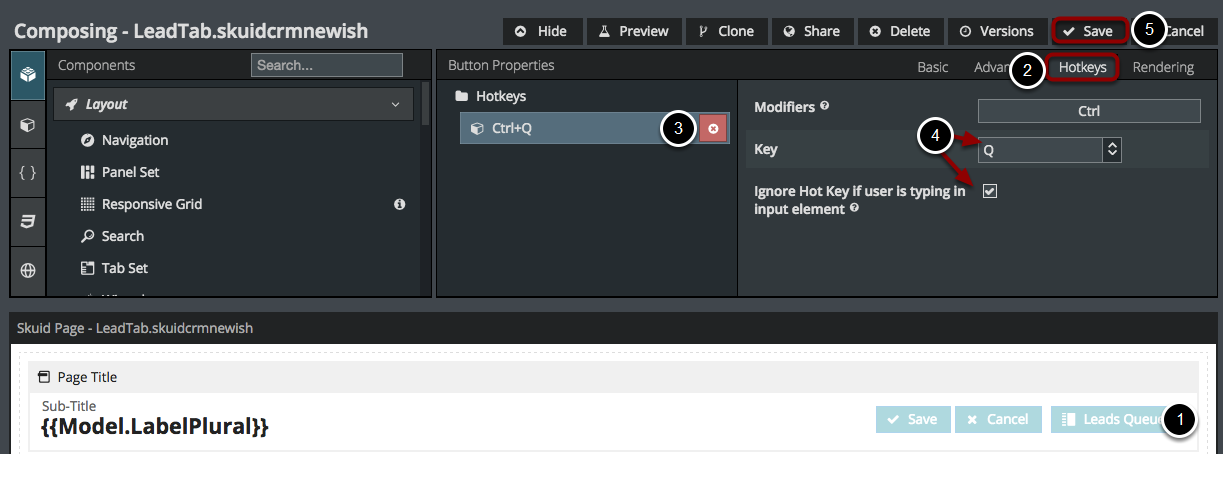
In this example, I have a Skuid page that’s my Lead Tab page. I have added a Page Title component and created a Leads Queue button to redirect the user to a different Skuid page, with a queue component.
I can quickly add a hot key to trigger the button’s action by completing the following steps:
- Click on the button in the App Composer.
- Select the Hot Keys menu item.
- Click the Add Hotkey button.
- Select the new keyboard shortcut and define its properties.
- Click Save, or, for bonus points, you can hit ⌘+S or Ctrl+S to save while on the Page Composer.
Whenever I want to jump to the Leads Queue from this page, I hit Ctrl+Q.
Essentials of Keyboard Shortcuts.

- Click on the Hotkeys in the property panel.
- Click on the Add Hotkey button.
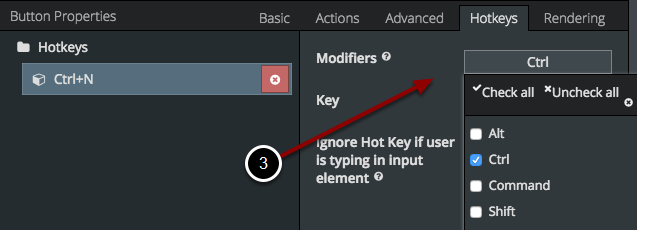
- Select one or more Modifiers.
Note: you can have multi-select modifiers in from this menu. For example, if you wanted Ctrl Alt Del to trigger the Cancel button, then you can check the boxes next to Ctrl and Alt to create the first part of the multi-key sequence.
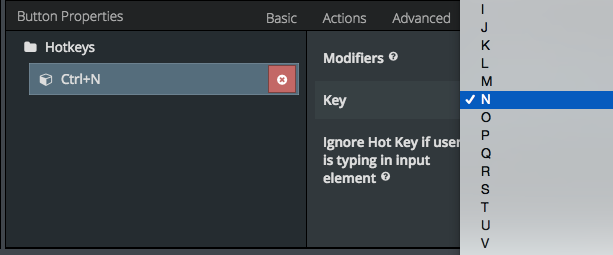
- Select the Key you would like to use as a hotkey.
Which keys are available? Glad you asked!
- Letters and numbers (A - Z and 0 - 9).
- Arrow keys (up, down, left, and right).
- Special keys (Backspace/Delete, Delete right, End, Home, Page Down, Page Up, and Tab).
- Function keys (F1 - F12).
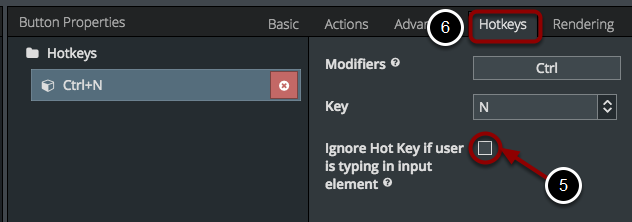
- Ignore Hot Key is optional. If you want to create a save hotkey that you can trigger after you’ve entered data in a text field, then this option is NOT necessary! Use this feature if you are assigning hotkeys to commonly used data entry keys, like Space, Return, arrow keys, Copy and Paste keys commands. and similar keys and key groupings.
- Save!
Keyboard Shortcuts in the Page Composer.
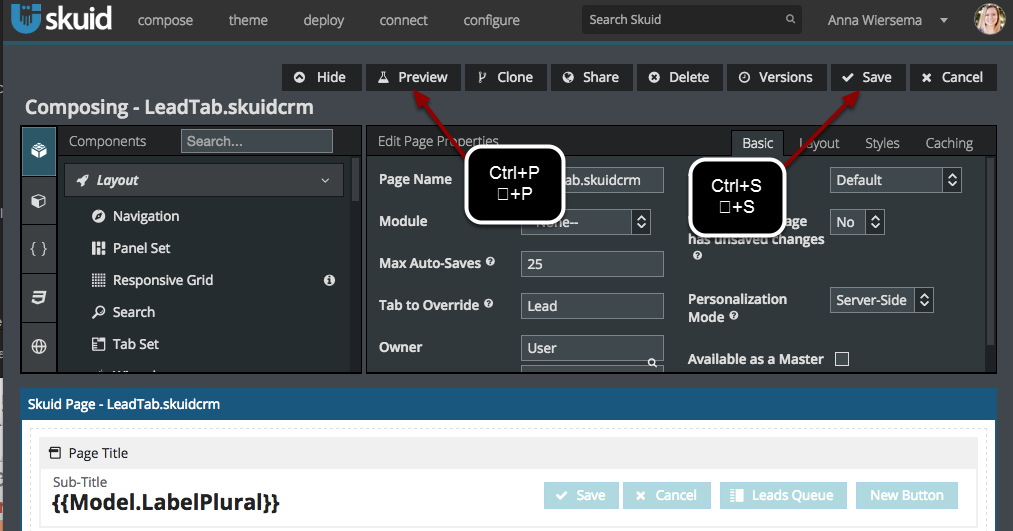
Save your work at any time while building Skuid pages by using the ⌘ +S or Ctrl+S commands! When you’re deep into building a page, you no longer have to scroll to the top of the browser’s page to find the Save button.
Preview your work instantly with the ⌘+ P or Ctrl+P commands! Inspecting your work is faster with these hot keys.
Where Can I Add Keyboard Shortcuts?
Simply stated: in the Page Title, Wizard, and Table components.
If you’d like more information about how hotkeys are used in the previously mentioned components, then see below for a more detailed explanation.
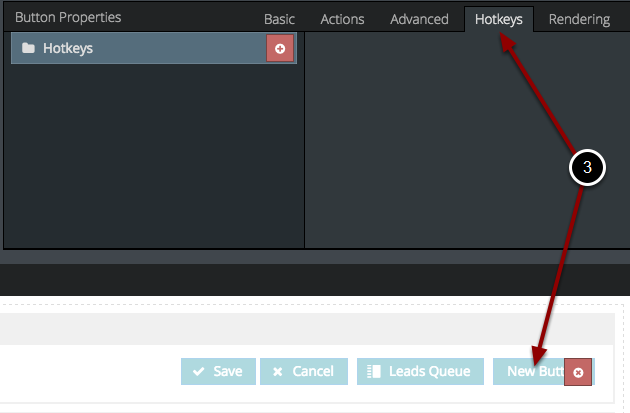
Keyboard Shortcuts in the Page Title Component.
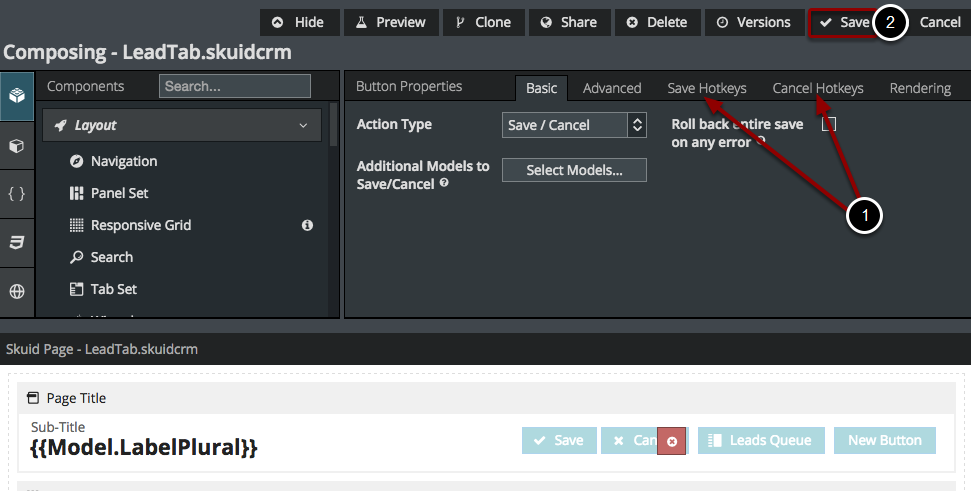
The Page Title component, by default, features a Save and a Cancel button. Additional buttons can be created by clicking Add Button. The default Save and Cancel buttons and any new button you create can be mapped to hot keys.
- Click on the Save or Cancel buttons in the Page Title component to bring up their property options. Two property tabs will appear; one for each of the Save and Cancel buttons.
- Create a hotkey as needed and be sure to save your work!
- Add hotkeys to each new button you create for the Page Title component.
Keyboard Shortcuts in the Wizard Component.
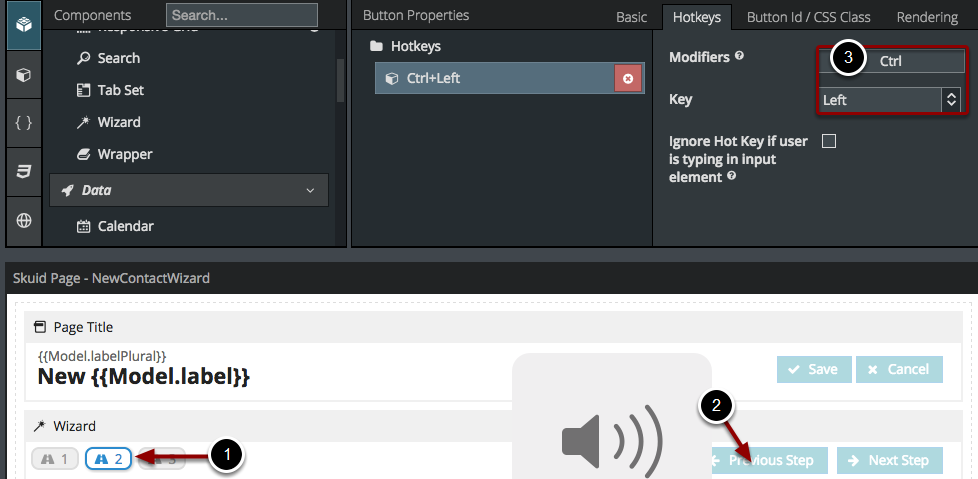
- Add hotkeys to any and all steps of the Wizard component.
- Select a button. Note: If you have multiple instances of a button, like the Previous Button pictured above, you will need to add the hotkey on each step.
- Choose your Modifiers and Key.
Keyboard Shortcuts in the Table Component.
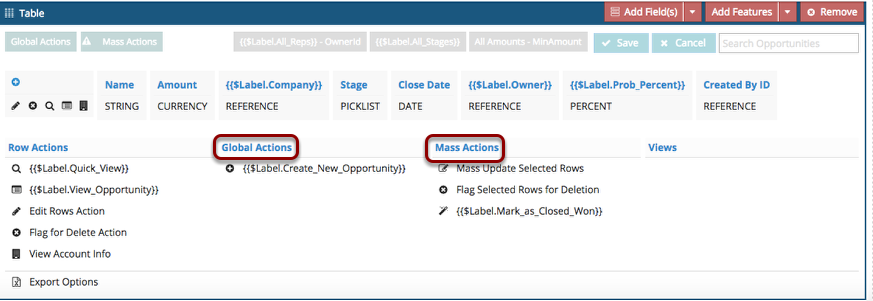
The Table component responds to keyboard shortcuts when hotkeys are assigned to Global Actions and Mass Actions.
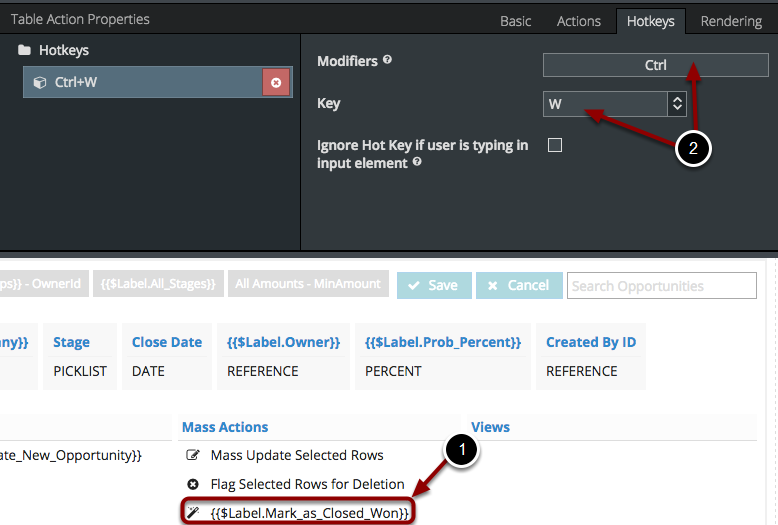
- Choose an individual Global Action or Mass Action. In this example, I want to use Ctrl + W to trigger my Mass Update Selected Rows action.
- Select Modifiers and Key.
Each Mass Action and Global Action can have its own hotkey!
Screen Reader Support
Some users employ screen reading technology that interprets what is displayed on the screen and outputs that information to assistive technologies such as text-to-speech or Braille output devices.
While runtime pages are not yet fully accessible to assistive technology, Skuid does incorporate the following ARIA (Accessible Rich Internet Application) markups into all pages, allowing standard HTML navigation elements to communicate with assistive technology:
- Navigation items that include sub-navigation are tagged with “aria-hasdropdown.”
- Expand states are tagged with “aria-expanded=true.”
- Collapse states are tagged with “aria-expanded=false.”
- Links are tagged with “role=link.”
- Actions are tagged with “role=button.”
Skuid continues to improve the accessibility of Skuid runtime pages, with the ultimate goal of meeting the global standard WCAG (Web Content Accessibility Guidelines) 2.0 AA.
Disabling keyboard shortcuts
If you wish to disable all keyboard shortcuts within Skuid, you may do so within Salesforce setup:
- In the Salesforce sidebar, search for or navigate to to Build > Develop > Custom Settings.
- Beside Preferences, click Manage.
- Click Edit.
- Check Disable Hotkeys for Skuid App.
- Click Save.
You may also set this on a per-user or per-profile basis by clicking New and creating a new setup. From there, set your preferred owners and check Disable Hotkeys for Skuid App.