Filter a table from a list of options
This tutorial breaks down the capabilities of the Select Option filter type. We’ll show how to set up conditions to create this kind of filter and how to determine what options will be displayed in the list. For details on filtering on lookup fields, see the Filtering on Related Objects tutorial.
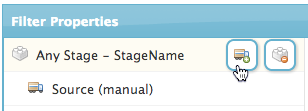
The Select Option Filter presents end users with a list of options to choose from to filter the records in a table.
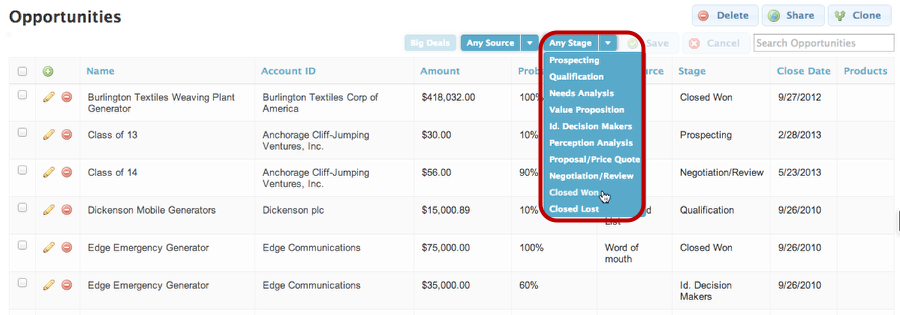
For example, the filter above lets users to choose which Stage they want to view Opportunities from. Follow the steps below to create a Select Option filter like this one.
Step 1: Add a condition on your table model for the field you want to filter on.
When you create a filter on a picklist field, Skuid can autopopulate the values of that field as options in your filter. (If you want to filter on a lookup relationship field, check out the tutorial on Filtering on Related Objects.)
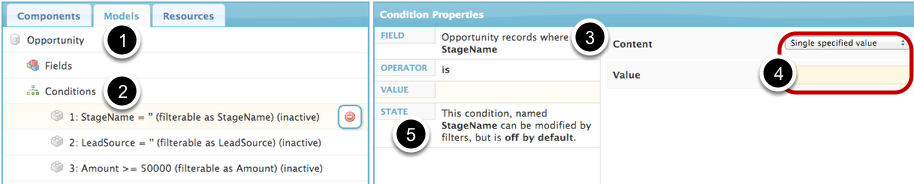
- Click on Models and then on the model that you’re using for your table (e.g. Opportunity).
- Click Conditions and click to add a condition. Click on your new condition to edit it.
- Use the field-picker icon to select a field from this object (e.g. Stage Name).
- Make no changes to Operator or Value. Content should be left as the Single specified value and Value should be left blank.
- Click State and choose Filterable Default Off. When you choose this state, it will give your condition a name (which you can change) and allow the condition to be discovered and manipulated by the table filter we’ll create in the next step.
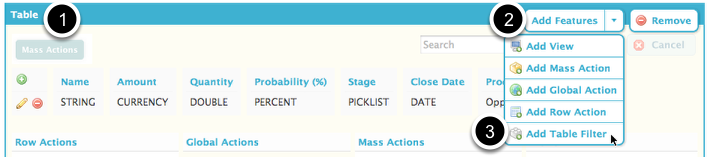
Step 2: Click on your Table, Add Features, and Add Table Filter.
Step 3: Edit Filter Properties.
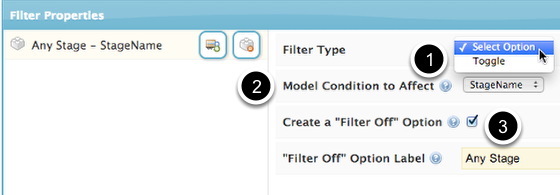
- Choose Select Option as the filter type.
- Choose the condition you made in Step 1 (e.g. StageName) as the Model Condition to Affect.
- If you want a “Filter Off” Option, click the checkbox. This will create an option where the field on your condition can be any value. Label this option appropriately, e.g. “Any Stage.”
Step 4: Click to add a Source.
The Source allows you to choose where options in the Select Option filter will come from, or to generate them yourself. You can choose Manual, Rows in a Model, Picklist Options for Condition’s Field, or Custom Source (Snippet).
In the Properties Pane, next to the name of your filter, click the Add Option Source icon.
You can choose the Source Type:
- Manual
- Rows in a Model
- Picklist Options for Condition’s Field
Note: this option only works for picklist fields.
- Custom Source (Snippet)
Depending on which option type you select, you’ll have some or all of the following choices:
- Merge source
- Option label template should be entered in this format: {{{Name}}}
- Label prefix (optional): this will be displayed before the value; enter the term with a colon and a space (for example, “Stage: “)
- Label suffix (optional)
- Snippet name
- Which Conditions will this Source’s options affect?
Just the default condition
Default condition and others
- Value to Inject into Default Condition
A. Create a list of options automatically from a picklist field.
Picklist Options for Condition’s Field is the quickest way to create a Select Option source. It just takes up the possible values of a picklist field—in this case, all the possible choices of the Opportunity Stage picklist—and spits them out as picklist options. You can add a Prefix and Suffix if you want—something to be displayed before the value like “Stage: ” (make sure you put the space in there) so your options will be “Stage: Closed - Won,” “Stage: Prospecting,” etc.
One possible problem with this is that some picklists many possible values. What if you want to just show three? Then make a manual source.
B. To filter by a related object, choose Rows in a Model as your source type.
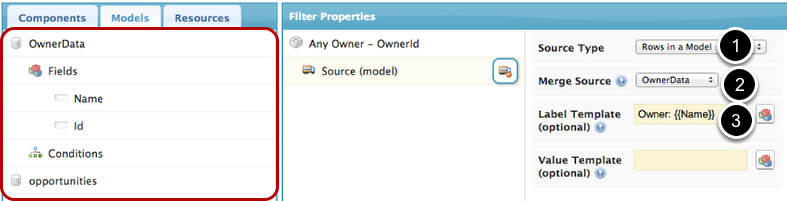
This option allows you to autopopulate the list options from a related object model on your page. This example shows an Owner filter on Opportunities, that has as its source an OwnerData model on the User SObject. For more information, see the tutorial on Filtering by related objects.
- Choose Rows in a Model as your Source Type.
- For Merge Source, choose the related object model which you will have created. This model should include, at least the Record Id field, and any conditions you want to apply to limit the options it supplies.
- Optional: Enter a Template such as {{Name}} which will be displayed. Make sure this field is included in your model.
C. For Custom Source, you can pull in the name of a custom Javascript snippet.

- Choose Custom Source as the type.
- Enter the name of a JavaScript Snippet.
In Skuid, you can write custom Javascript right from the Page Builder! For more information, see the Skuid Developer Resources article on Snippets and the tutorial Including Custom Javascript in a Skuid Page.
D. Manual: Create each option separately.
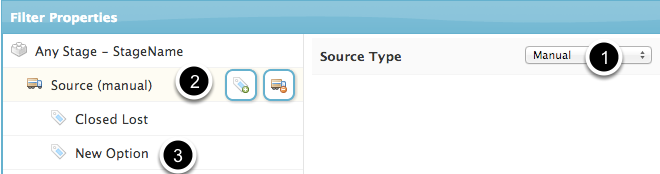
- Choose Manual for the Source Type.
- Click on the icon to add an option.
- Click on the New Option to edit it.
Manual Sources that Affect the Default Condition
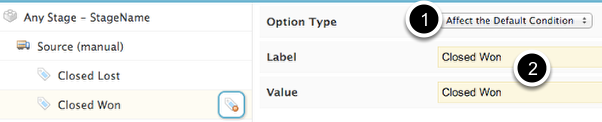
- Choose to Affect the Default Condition. This means this source will affect the condition this filter’s set to (e.g. StageName)
- Add a Label and a Value for this option. The label is the name that users will see, the Value is a possible value of the condition field.
Manual Sources that Affect Other Conditions.
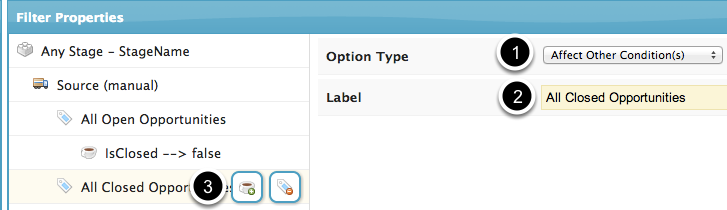
Do you have other conditions that you want options on this filter to pull in? If so you can create a manual option that Affects Other Condition(s).
- For Option Type, choose Affect Other Condition(s).
- Create the Label that users will see for this option.
- Click to add and edit a new effect.
Step 5: Now you can choose to (de)activate conditions and, if applicable, set their value.
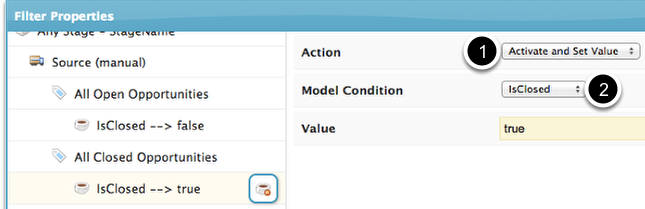
- Click Activate (or Deactivate or Activate and Set Value). If your condition doesn’t have a value specified, you can set the value here.
- Choose the Condition. In this case, we’ve created an additional Stage Name condition called “IsClosed,” on the “Is Closed” checkbox. (See the picture below for more details on the condition). When we set the value to true, this option will only return records where the ‘Is Closed” box is checked. We also created an “All Open” option, that returns all Open Opportunities (e.g. where Is Closed is false).
You can click the coffee icon again for this option to add another condition to affect.
(Example condition on the “Is Closed” checkbox.)

Step 6: Click Save, then click Preview.

Result: Your Select Option filter will be displayed on your table, with the Options you had pulled in, or created yourself.
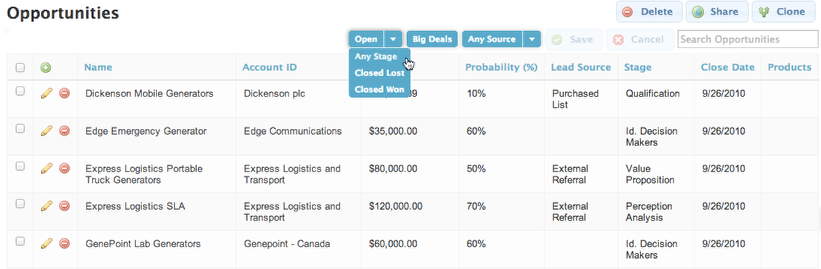
Click to filter your table by one or multiple criteria.
Troubleshooting
- Make sure all your conditions are set up according to the instructions in this tutorial, and that all the fields you use for conditions are included in your model.
- Did you try to make a Metadata-Sourced filter on a field that wasn’t a picklist? For Lookup fields, create a model on your page for the Lookup object and choose the “Model Sourced” source option.
Go into the Web Developer Console to check errors.
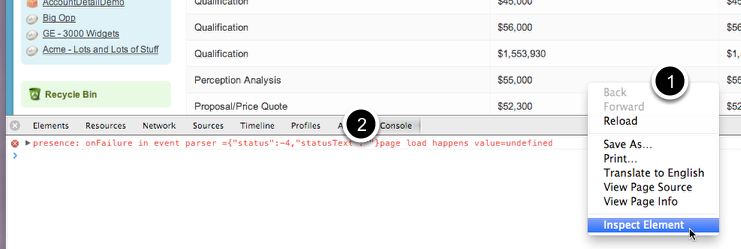
This sounds scary, but it’s pretty easy. In Chrome, you can right click and choose Inspect Element > Console. In Firefox, it’s in menu bar under Tools > Web Developer. If there’s an error, it may make no sense to you. But if the error has “Id” in it, than it probably means there’s something wrong with your models.
In the Console you can also Delete Cookies.
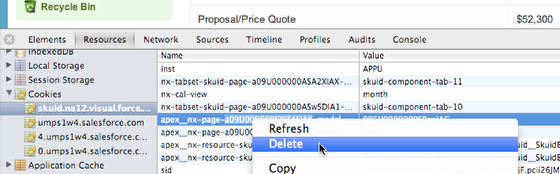
Skuid uses cookies to remember the open values in your picklist. That way, when you come back to this page, it will remember the exact results you were viewing. But, if you were previewing this page when you were building it and your models weren’t set up correctly, then your cookies could be storing the incorrect filter values. Try deleting some (apex_nx_page… looks like it might be promising).
Still not working? Ask for help at community.skuidify.com
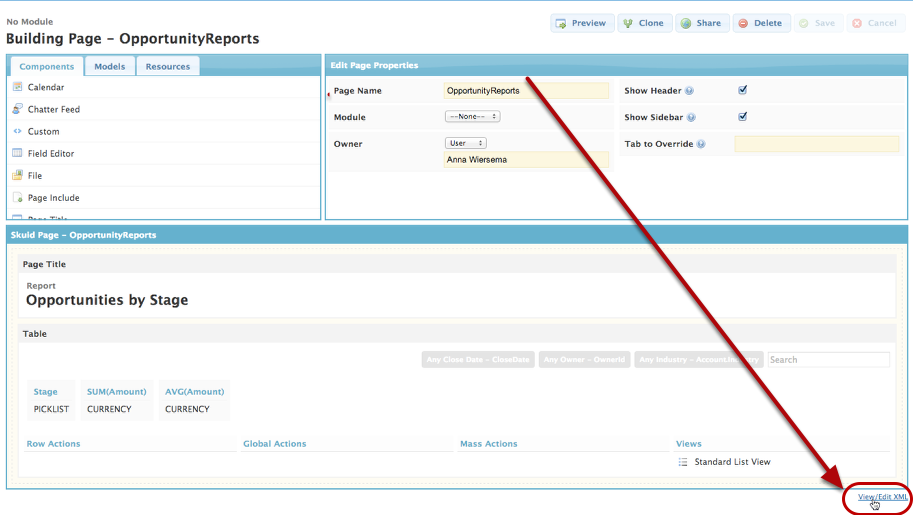
In the page builder, whenever you’ve saved, you can click to View/Edit XML.
Select all of the XML and copy and paste it into your email. This will enable others to reproduce your page and solve your problem quickly.
