Build a Custom “Create New Record” Page
This lesson shows how to build a Create New Record Page from scratch with Skuid. We’re going to make a Create New Contact page, but you can follow these instructions to build a new record page for any standard or custom object. You can use this page to override the standard Salesforce Create New Record Page (for detailed instructions, see Overriding the New Action).
Goal: Build a custom Create New Record Page

Step 1: Click Compose > New Page
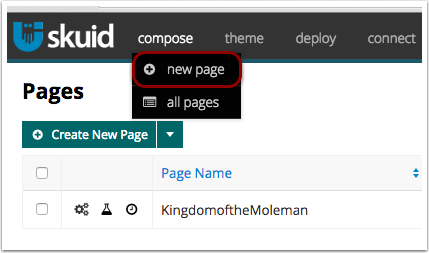
Click Compose > New Page.
Or, if you’re on the All Pages list, you can click Create New Page.

Step 2: Create a model that will create a new record
Models allow you to pull data into your page from existing objects. Without models, there can be no information on this page.
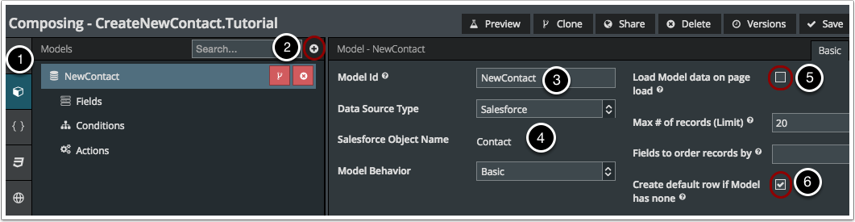
- Click on the models tab.
- Click to add a new model.
- Create a Model Id.
- Select theData Source Type and Object Name to specify the Salesforce or external object you want to use.
Warning
Uncheck “Query on Page Load.” This will prevent this model from bringing in existing records.
- Important: “Check Create Default Row if Model Has None.”
For the curious, we unchecked Query on Page Load to create an “empty” model when the page is loaded. When you checked the Create Default Row if Model Has None box, you created a condition that checks to see if the model has data. When the result returns “no data currently in this model”, the Skuid page creates a new row on the page for you to enter a new record!
For more information about Skuid models, see the Model overview.

Step 4: Select the fields you want to use on this page
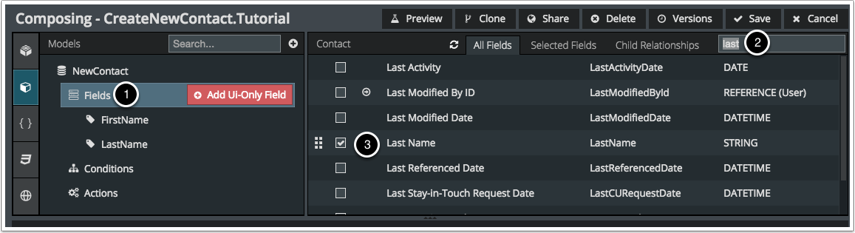
- Click Fields.
- You can search for fields by name here.
- Check the boxes to select the fields you want.
Step 5: Double click to add the Page Title component into the workspace
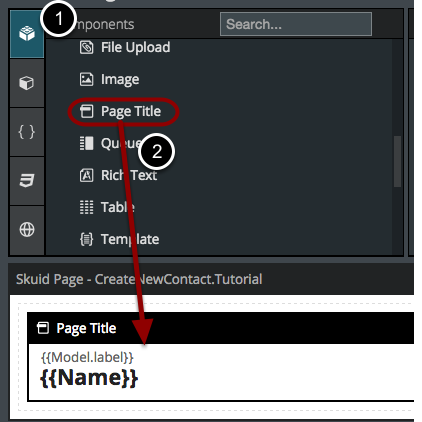
The Page Title component provides a quick way to title this page.
- Click on Components.
- Double click to add the Page Title into the Composer area (or drag and drop it in).
For more information about the Page Title and other components, see the component overview.
Enter a title for your page
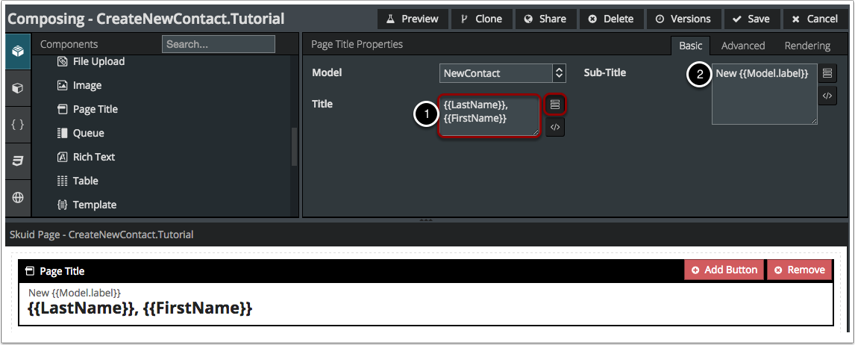
You can use {{curly brackets}} to pull fields from your model into this title.
You can manually enter the curly brackets and fields. For example, type in {{LastName}}, {{FirstName}}. Alternatively, you can use the Field Picker to insert the fields whose you want displayed.
If you were to Save this page and click on the Preview button, then you would be directed to a nearly empty Skuid page with just the Page Title bar information. You’ll notice the Sub-Title says ‘New Contact’ (or whatever you typed in to the Sub-Title field). You’ll also notice that there is just a comma below the Sub-Title. The reason is that the {{LastName}} and {{FirstName}} fields are currently holding no data in the model! In the following sections, we’ll add text fields for you to enter the Last Name and First Name information. When a user is entering data in the Last Name and First Name fields, the curly brackets in your page title will automatically update with the information! Pretty cool.
Step 6: Add a Save/Cancel Button
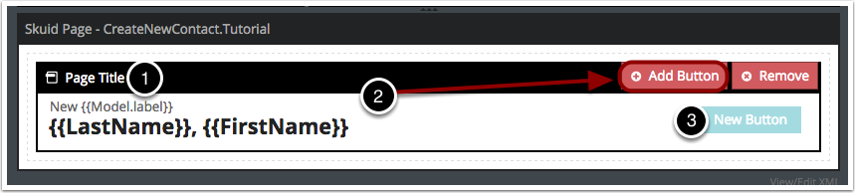
- Click on the Page Title component title bar.
- Click Add Button.
- Click on the New Button to edit its properties.
A. Choose Save / Cancel as the action type
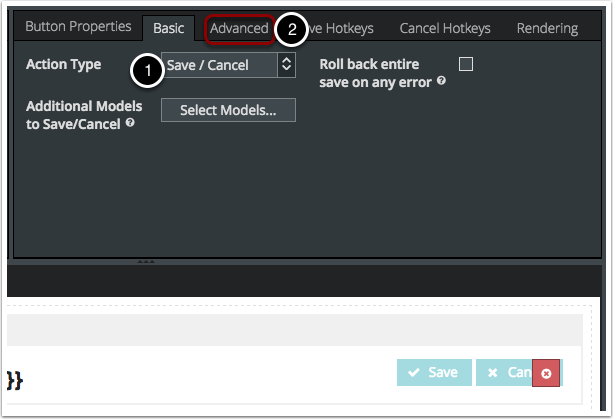
- Choose Save / Cancel as the Action Type (and notice that the button below reflects these changes in real time… oooh, aaah)!
- Click Advanced.
B. In Advanced properties, you can set the Redirects
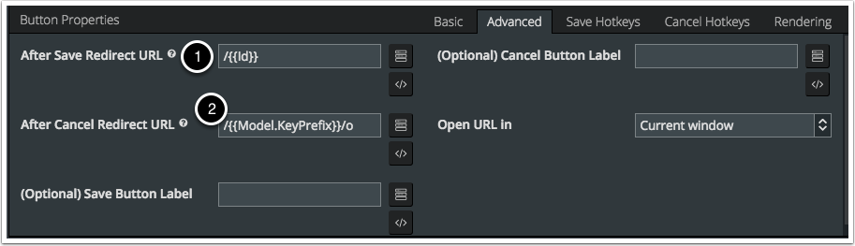
Set Redirect After Save to the Detail Page for the new record by entering /{{Id}} Be sure to note that Id starts with a capitalized ‘I’!
Note
To successfully implement this redirect process using /{{id}}, you must select Save / Cancel as the action type in the previous step.
Set the Redirect After Cancel to the Tab Page for this object by entering /{{Model.KeyPrefix}}/o
Note
To redirect users to another page, you can find its URL by going to that page yourself in another window. Copy everything in the URL after force.com and paste it in the Redirect areas in the button’s Advanced Properties.
For example, if I wanted my Cancel redirect to go to my custom Leads tab page, then I would paste in /apex/LeadTab?save_new=1&sfdc.override=1
Bonus: You can also create a Save and New button!
- Add another button to the Page Title component.
- Set this button’s label to “Save & New.”
- Set its button type as Run Multiple Actions.
Now, within the Actions tab of this button, add the following actions and settings
- Save Model changes: save this page’s only model
- Remove all rows from Model: once again, select this page’s only model
- Create new row(s): select this page’s model, and place the row at the start of Model data
When your users click this button, the information they entered will be created as a new record within the object—a new contact in this example—and their field editor will be refreshed, allowing them to create a new contact immediately!
Step 7: Double click on the Field Editor to add it under the Title component
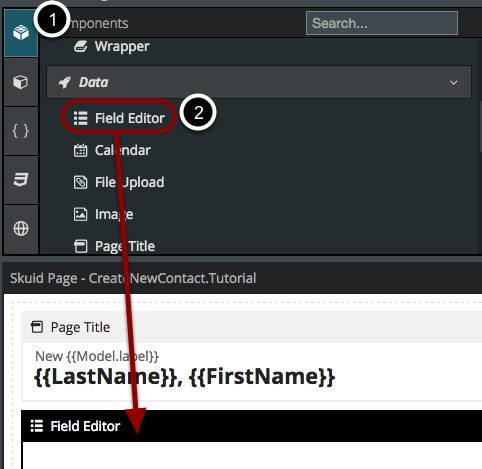
- Click Components.
- Double click the Field Editor or drag and drop to add it beneath the Page Title.
A. Customize the Field Editor Properties
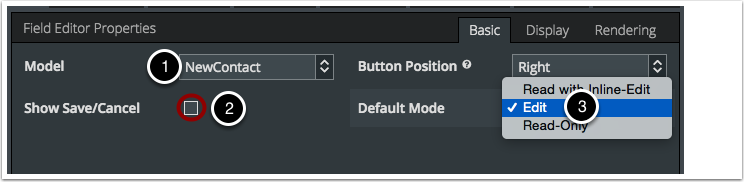
- Make sure the appropriate Model is selected. Since we only have one model, this shouldn’t be an issue.
- We included Save / Cancel in the Title component, so there’s no need to show them again.
- Important: Select Edit Mode. This will lock all fields in edit mode for the Create New page.
B. Rename field editor sections
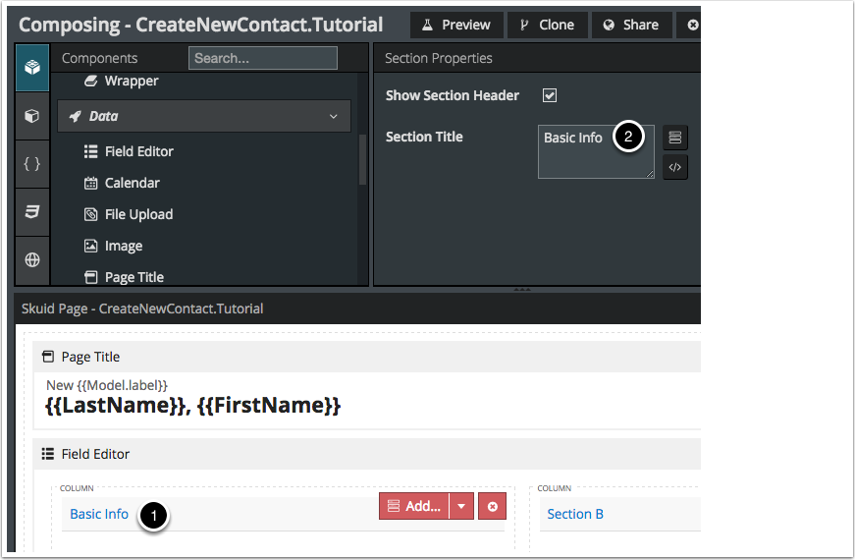
- Click on a section to edit its name.
- Enter a new Section Title. It will be updated below automatically.
Step 8: Add fields to the Field Editor
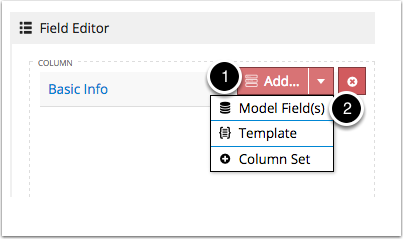
- Click on the Add Field(s) button after clicking in the section where you want to add your Fields.
- Click on Model Field(s).

- Click All Fields to view a list of all the fields in the object (not just the ones you’ve selected).
- Use the Search to help you narrow down fields.
- Click on the plus sign to add a new field to your model.
- Check the box beside the fields you want to add to the field editor. In this example, the Profile section needs the First Name, Last Name, and Account Id fields. Remember: the Add Field(s) window arranges the Fields according to the order in which you select them.
- Click Apply.
Step 9: You can also create related records on this page
You can also add related lists to this page to create related records.
- To do this, add a new model for the related object. (Like your main model, you should choose not to load data on page load, and to create a default row if the model has none.)
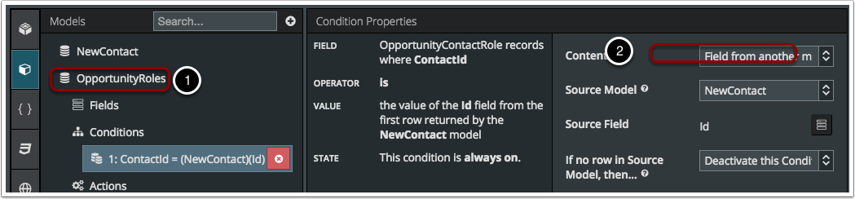
- Include a field from another model condition that will connect the models on the Id field (for custom objects, this would be the Contact__c lookup field and the Record ID field on the main model.)
- For many to many relationships, you need to create this model on the join object e.g. Opportunity Contact Role association.
- You can also go back into your Save Button (see Step 6A) and choose this model under “Additional Models to Save/Cancel.”
Warning
Do not use a URL parameter condition because since the Id is new, it won’t be in the URL.
Step 10: Click Save, and then click Preview

Result: Your Create New page is displayed
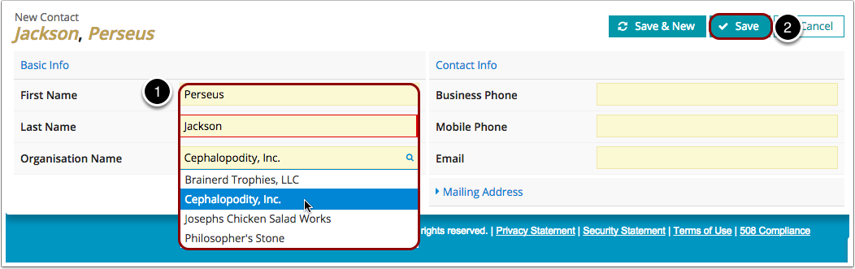
- You can tab through the fields to enter the new record’s information. When you type all or part of a record name in a lookup field, a list will automatically appear to assist you.
- When you’re done entering information, click Save. This new record will be added to the system and you will be redirected to the URL you specified in Step 6B.
Shortcut: Use Templates
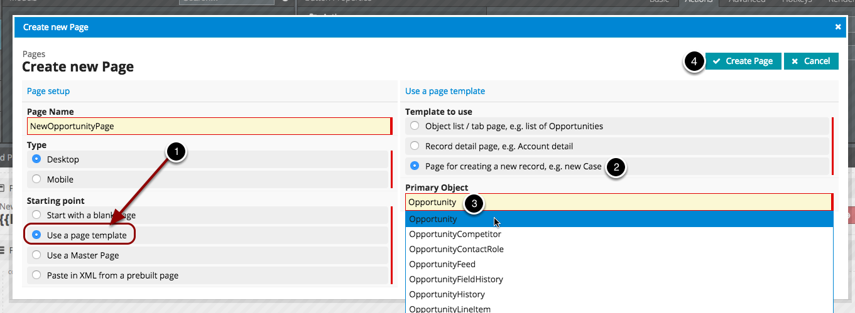
Want to build this page even faster? In Step 1 when you’re creating the new page, click Use a page template and then select Page for creating a new record and then enter the Primary Object for you want to create on that page (this will work for any SObject, standard or custom).