Create a Custom Clone Page
This tutorial shows you how to create a custom Clone page. In this example, we’ll be creating a custom Clone Contact page, but you can follow these instructions to create a custom clone page for any object, standard or custom, that has a “clone” action in standard Salesforce. (For standard objects that do not include a clone action, such as Account, see this tutorial.)
One very common feature Salesforce users request is the ability to clone not just a single record, such as a Contact, but also some or all of its child records as well, such as a Contact’s related Cases, etc. Accomplishing this typically involves a lot of custom coding and development work, but with Skuid, you can craft a custom clone page for any object type using the Skuid drag-and-drop page builder! Let’s get started.
The first thing to know is that any Skuid detail page, such as a Contact detail page, is a custom clone page waiting to happen — the fastest way to create a custom clone page is to just clone an existing detail page, such as a ‘ContactDetail’ page you may have already created, and then tweak it to remove components that are not needed during the clone process, such as system information fields.
Step 1: Create a new Skuid page, optionally by cloning an existing detail page.

To save time, we can clone an existing Detail Skuid Page by going to that Skuid Page, clicking More Page Actions, and selecting Clone.
For instructions on how to set up the models and conditions on a detail page, see the Custom Detail Page topic.
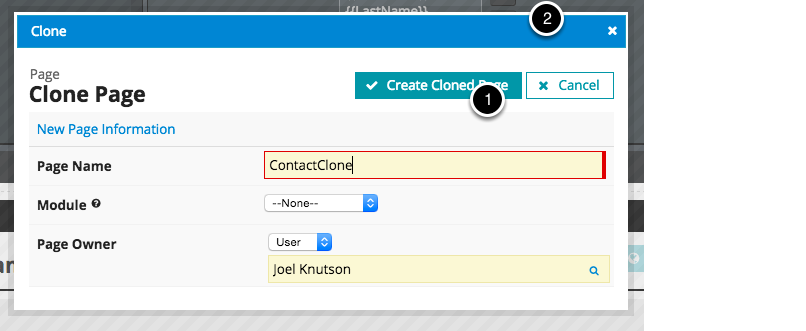
Name the cloned Page and click Create Cloned Page.
Edit Page: ContactDetail
Step 2: Update the main page model to always Clone Model data.

Click on the main page model.
Click Advanced.
For Clone data, choose Yes, always. This will make it so whenever this page is opened it will clone the record whose Id is supplied in the URL.
Note
You could use “Yes, if ‘clone’ and ‘id’ parameters are present in URL to set up a page that could function as a new or as a clone page, but you would have to want to see exactly the same objects, fields, and components on each page, which may not be the case.
Remove any unwanted fields.
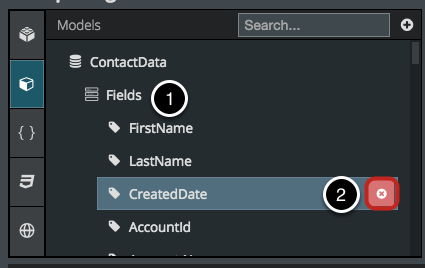
All of the fields included in this model will be cloned (even if they don’t appear on the UI). Remove any fields you don’t want to be cloned, and fields like CreatedDate, LastModifiedByID and other fields that can’t be cloned anyway.
Step 3: Update related models to clone related records.

Repeat Step 2 for each related model, selecting Yes, always.
A. Make sure all your related models are linked to the main model with a “Field from another model” condition.
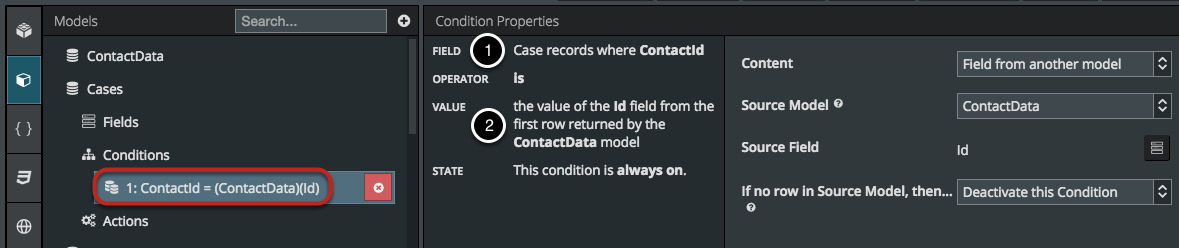
- Create a condition on the Lookup relationship with the main object,( e.g. ContactId for standard objects, Contact__c for custom objects).
- For value choose Field from another model. Choose the main page model (e.g. ContactData) for the source model, and the Record Id field for the source field.
Warning
Make sure all related objects include the “Contact Id” field in the model. Otherwise the records that are created in these models will not be related.
You must use a Field from another model condition for all of your related objects. You cannot use a URL parameter condition because that would just update the original record’s related lists.
B. Include all fields in the model that you want to be cloned from the parent object.

- Pull in all fields on the object that you would like to clone; any fields not in the model will not be cloned from the original record.
- However, you only have to put in components those fields that you’d like users to be able to change during the clone process. For more information about adding tables of related records, see Add Related Lists.
Repeat Steps 3A-B for all related objects whose records you want to clone.
C. Delete Unwanted Models.
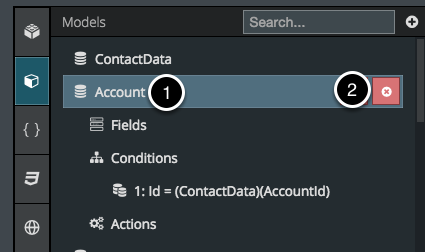
For example, on the Contact Detail page we have a model on the Account object to bring in some information from the related account, like street address etc. We don’t want to clone this, so I’m just going to delete the model.
D. Don’t include the Attachment object.
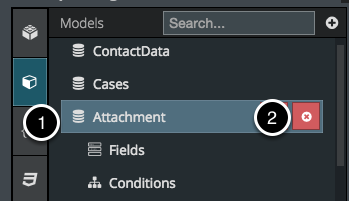
You cannot attach files to a record before it is created, so I suggest you remove attachments from this page entirely.
Workaround: Include the Wizard Component to break the Clone process into multiple steps, e.g. a “Clone Record” step and an “”Add Attachments” step. On the first step, configure your “Next Step” button to “run multiple actions” and have it Save the new (clone) record and navigate to the next step.
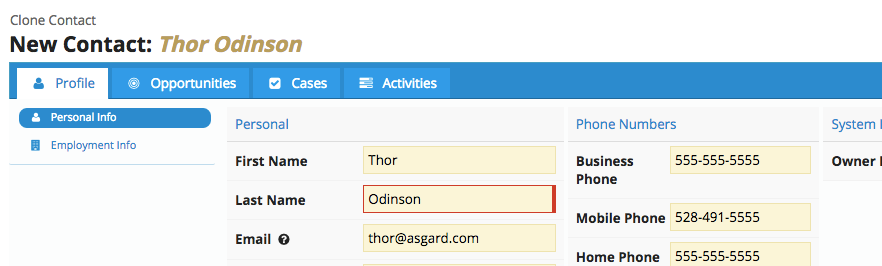
Step 4: Change the Page Title to reflect that this is a Clone page.
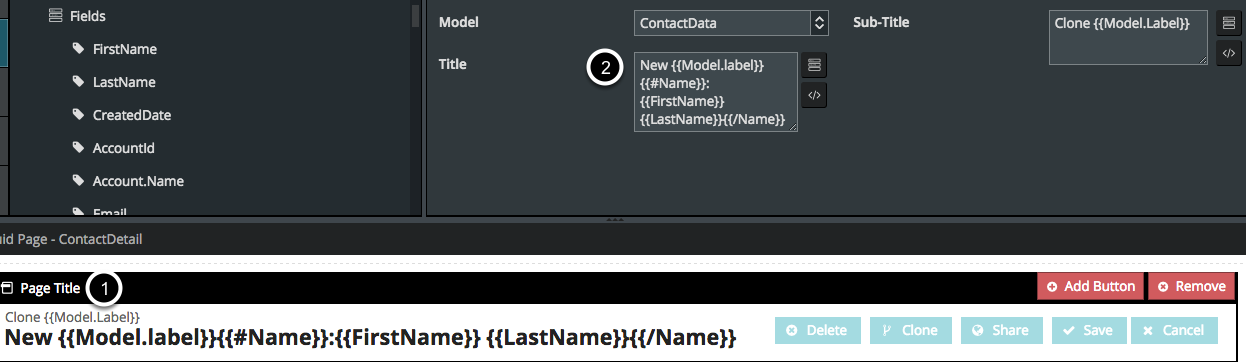
- Click on the Page Title.
- Edit the Title and Subtitle fields to reflect that this is a clone plage.
The Title looks really fancy here, but it just ensures that the the title will show the name of the new record, and that the colon won’t be displayed unless the name field is populated. (This template will work if you have the Name field included in your model.)
New {{Model.label}}{{#Name}}: {{FirstName}} {{LastName}}{{/Name}}
A. Remove all Page Title Actions except for Save/Cancel.

Click on a Page Title Action, then click to delete it.
B. Click on your Save/Cancel button and make sure it’s saving/canceling all the right models.
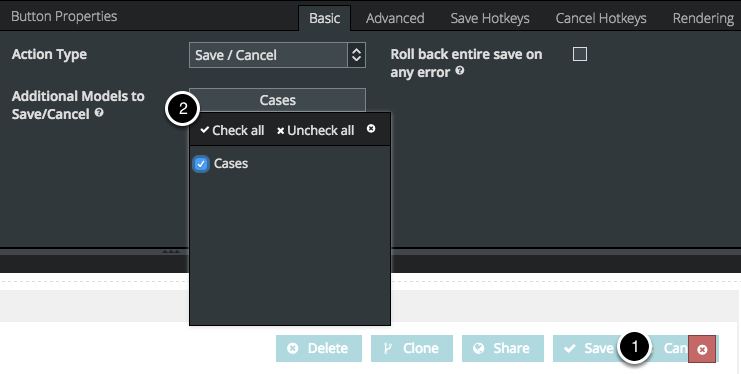
C. In Advanced, change the redirects after Save/Cancel.
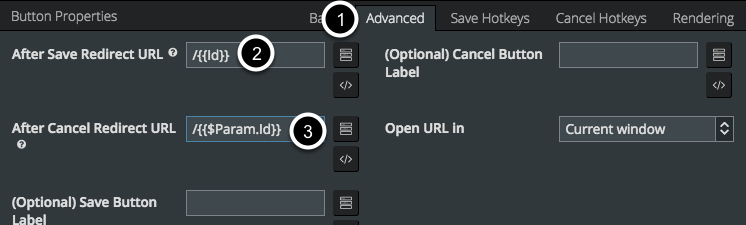
- Click to open Advanced Button Properties.
- For Redirect after Save, enter /{{Id}}. This will take users to the new record’s page.
- For Redirect after Cancel, enter /{{$Param.id}}. This will return users to the original record’s page.
Step 5: Set all components to Edit Mode and Remove the Save / Cancel buttons.
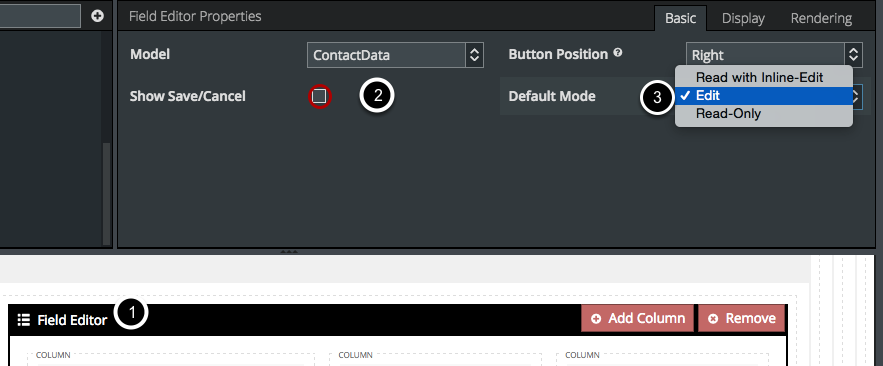
Because the Save / Cancel we created in Step 4 will function for the whole page, you can go into every table and field editor and remove its Save / Cancel button.
- Click on each Component.
- Deselect Show Save / Cancel.
- Choose Edit as the default mode.
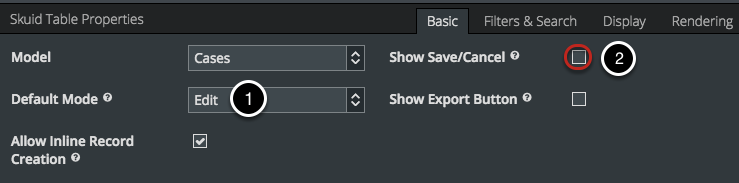
Do the same for all your Skuid Tables.
Step 6: Remove all fields that you don’t want users to modify.
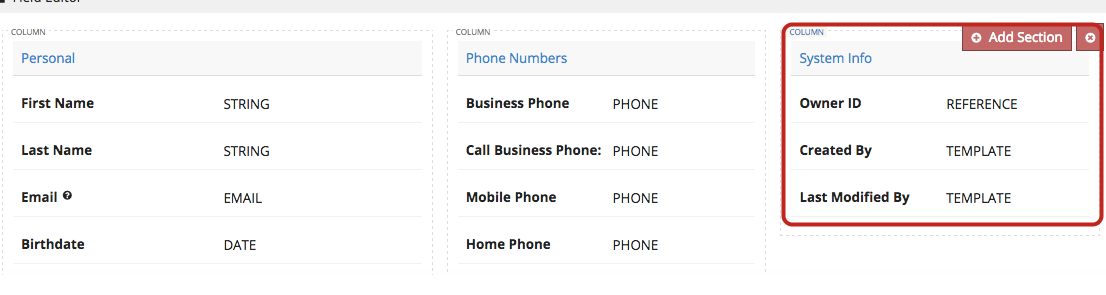
Remember, all fields and objects you’ve included in your models will be cloned, but you can choose what you allow the user to modify.
A. Remove tabs and components you don’t want to appear in the clone page.
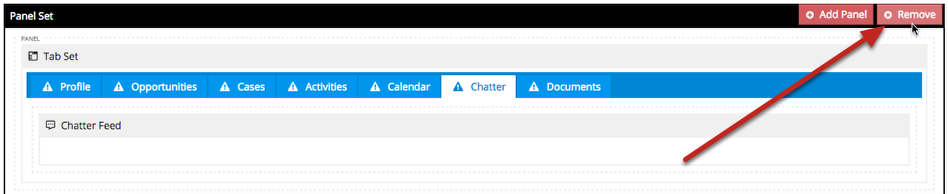
We’re streamlining this page, so there’s not too much to distract this user from the clone process.
B. Remove unwanted table actions.

For this example, I’m removing any table actions that would redirect the user to another page.
Note
You also may want to enable mass update and mass delete on this page’s tables, if not already enabled.
Step 7: Save your page.

This is really key; hopefully you’ve been doing it periodically throughout the process.
Step 8: Create a corresponding Visualforce Page.
Before you begin this step, prepare your Visualforce markup. For this tutorial, use a basic Redirect override without page assignments.
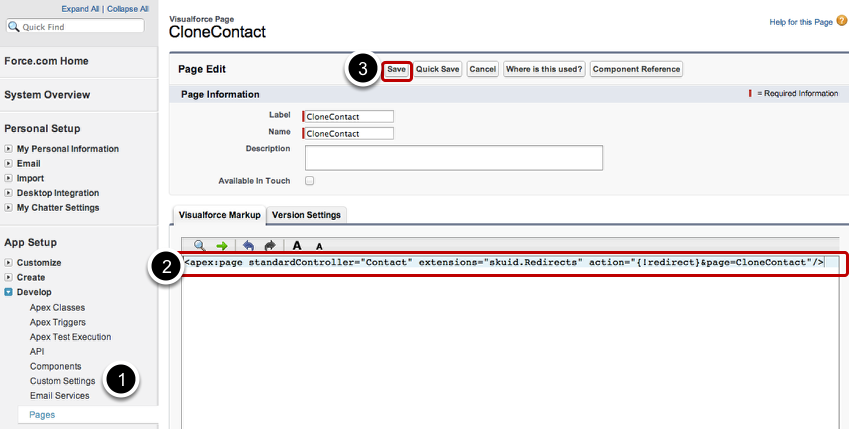
- In (Salesforce) Setup > Develop > Pages, click New to create a New Visualforce Page. Call this page CloneContact (or whatever you want).
- Paste the appropriate markup in the Visualforce Markup pane.
- When you’re done, click Save.
Note
You can also choose to redirect to a Page Assignment here.
A. For standard Salesforce objects, in Buttons & Links, click “Edit” next to Clone.
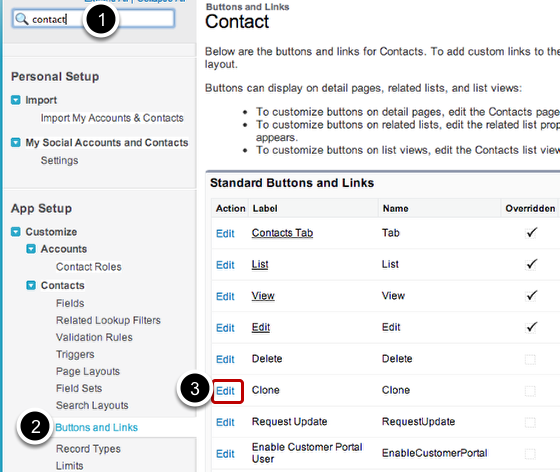
- Enter the name of your object in the quick search bar.
- Click Buttons and Links under the object.
- Click Edit next to the Clone action.
B. For custom objects, click Create > Objects > Object Name > Standard Buttons and Links > Edit
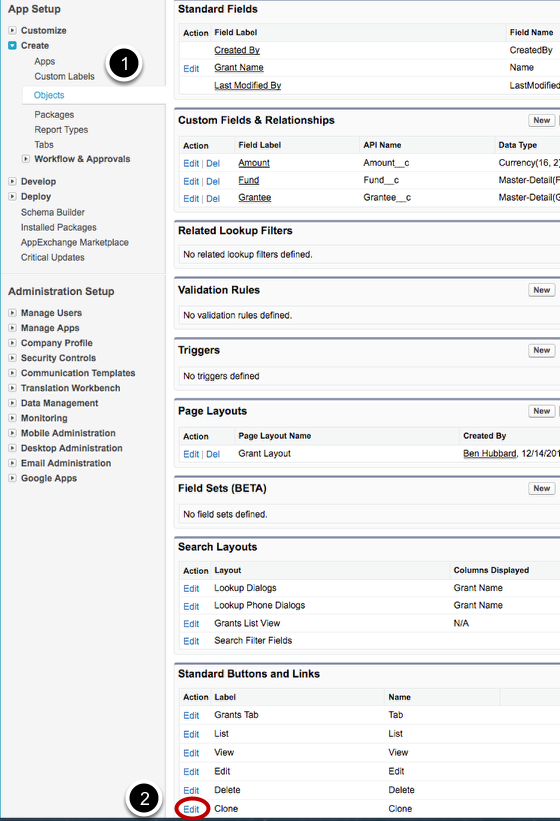
- Click Create, then Objects.
- In the list of custom objects, select the one you’re overriding the Clone page for.
- On the custom object page, scroll down to Standard Buttons and Links and click Edit next to the Clone action.
C. Choose the new Visualforce page as the override for the Clone action.

- Choose Override With Visualforce Page and select the Visualforce page you just created from the dropdown list.
- Click Save.
Moment of Truth: Test it!

Go to a Contact with related Cases (or whatever object you created this clone page for) and click Clone. Your custom clone page should appear. If it does not, go back and to Step 8 and make sure your page override is set up correctly.
A. Modify the cloned record.
B. Modify related records and click Save.
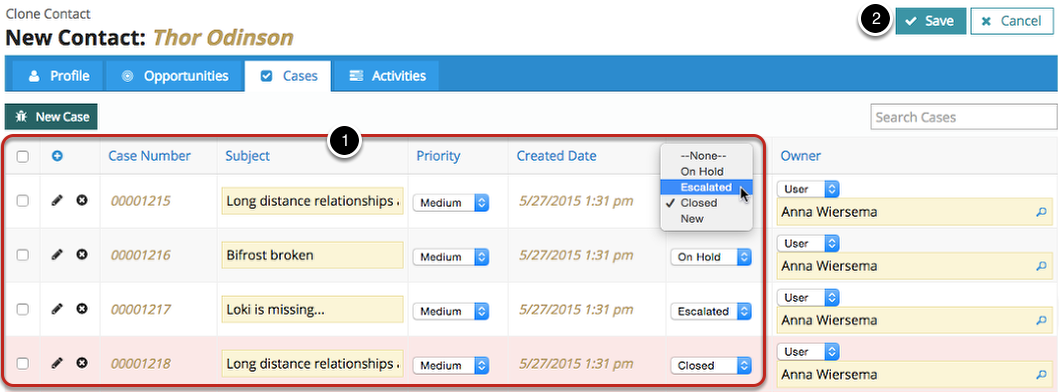
Make modifications to each of the objects in the clone page to ensure that they Save and Clone properly.
Success! You should be redirected to your newly-created Contact’s page.
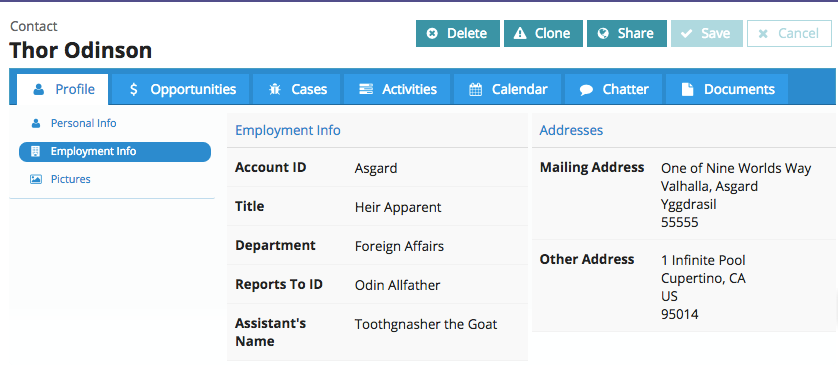
Click around to make sure that all of their related information was cloned as well.
Not Working? Common Problems
- If your custom Clone page isn’t appearing when you click ‘Clone’, double check that you created the Visualforce page and set the override correctly in Steps 8-10. The markup for your VF page should be as follows, (substituting your own Object e.g. Contact__c and Page Name):
<apex:page standardController="Contact" extensions="skuid.Redirects" action="{!redirect}&page= CloneContact"/>
- If some of your objects aren’t cloning, make sure that each model includes the Lookup Relationship field (see Step 3A).
- Make sure that all your related objects include the Field from another model condition on the lookup field described in Step 3.
- Another problem could be that you didn’t set Save / Cancel to all objects (see Step 4B).
- If you’re previewing your page and the clone action’s not working, check to make sure that you’ve updated your models to create clones (see Steps 2-3).